CoinPayments offers different integration options to suit various business needs, whether you’re processing crypto payments for products, services, or other use cases. With these flexible solutions, you can choose from:
Integrated Checkout Flow: A pre-built, ready-to-use payment flow designed to handle the checkout process with minimal setup. Ideal for a range of integrations including invoicing, payment buttons, e-commerce plugins, and API-generated invoices.
White-labeled Checkout Flow: A customizable solution available through the CoinPayments API, allowing you to deliver a fully branded checkout experience with their own branding.
In this guide, we’ll explore these use cases in detail, including:
By the end of this guide, you’ll have a clear understanding of the capabilities of each integration type and how to apply them effectively to your business operations.
Integrated Checkout Flow
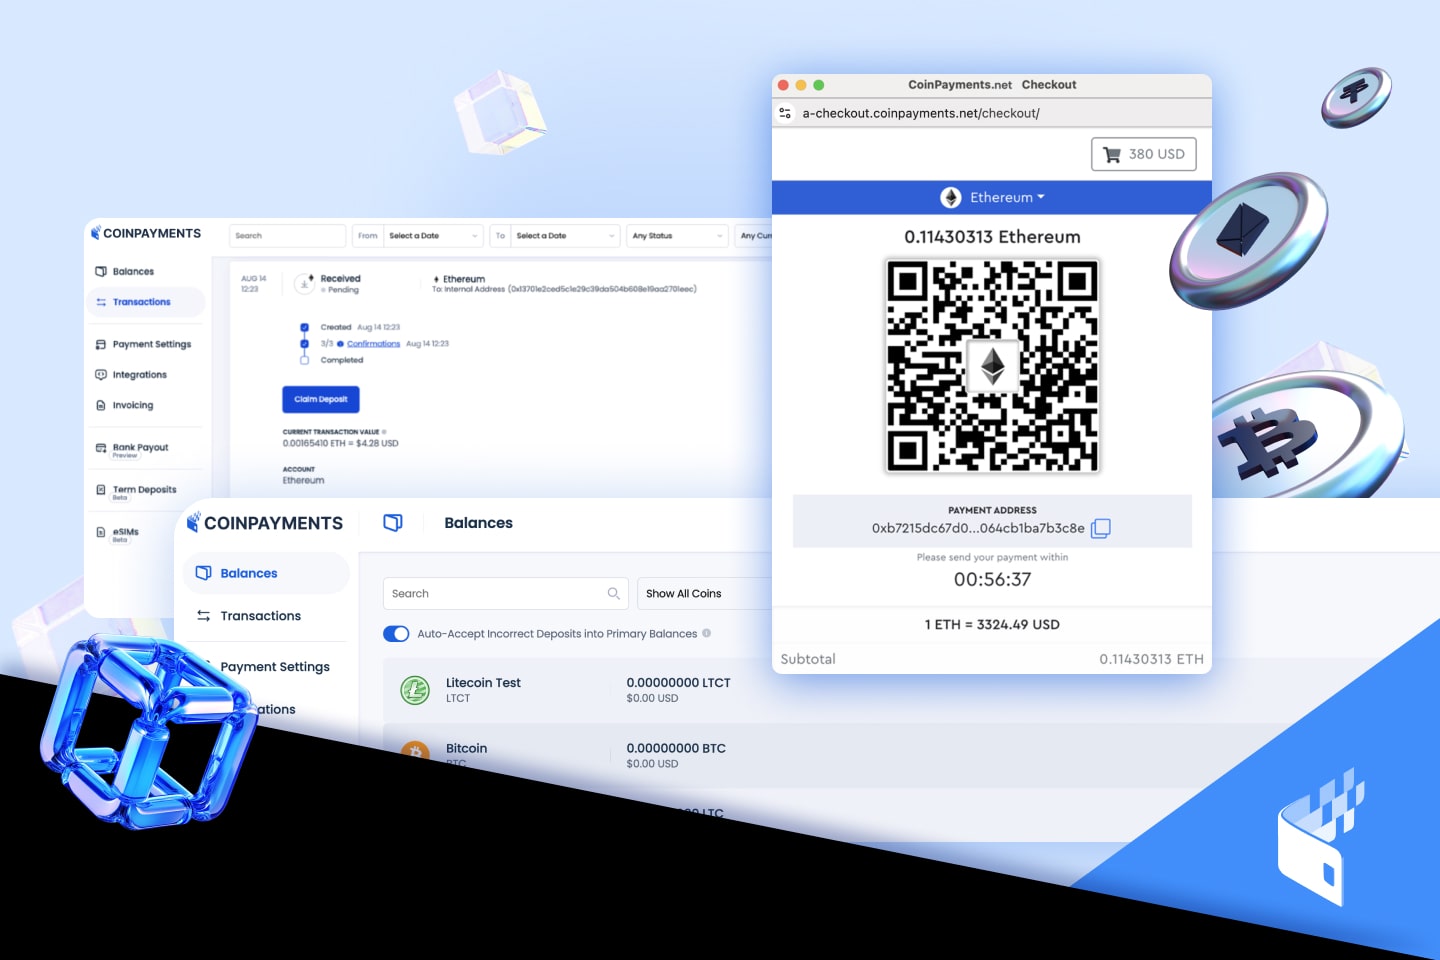
The Integrated Checkout Flow is a pre-built solution offered by CoinPayments, providing a seamless and efficient payment process for businesses. This flow requires minimal setup and is available across a variety of integration types.
Supported Integration Types:
Invoicing Tool: Generate invoices for one-time or recurring payments.
Pre-generated Payment Buttons: Allow quick payments for fixed-price items or services.
E-Commerce Plugins: Use for invoicing in supported online store platforms.
API-Generated Invoices and Payment Buttons: Automate and customize the checkout process using API integrations.
Checkout for Invoicing Tool, Pre-generated Payment Buttons, and e-Commerce Plugins
Invoice or Payment Button Generation:
Payment Generation:
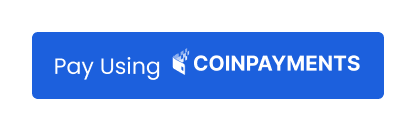
When buyers receive an invoice generated via the CoinPayments Invoicing UI or e-commerce plugin and click on the “Pay Using CoinPayments” button, they are redirected to the CoinPayments integrated checkout flow
Also, clicking a pre-generated payment button redirects your client to the CoinPayments integrated checkout flow.
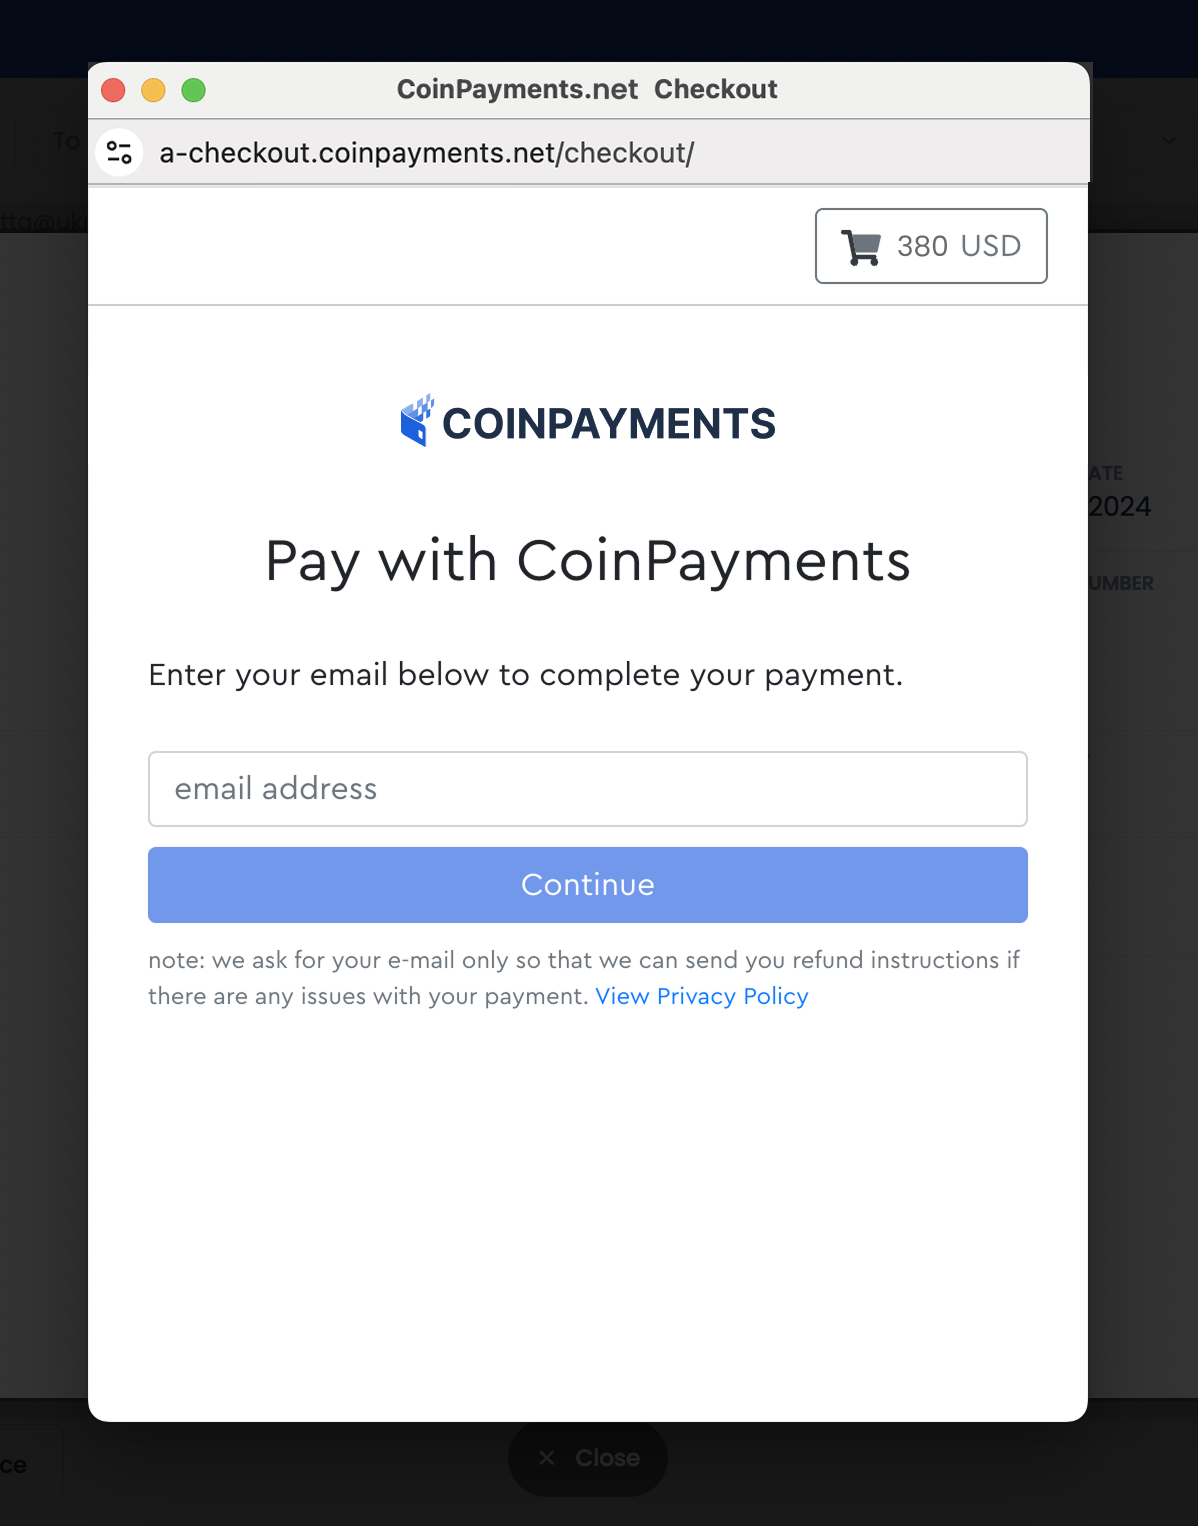
Email Entry for Refunds:
The buyer provides their email address for potential refunds and clicks Continue.
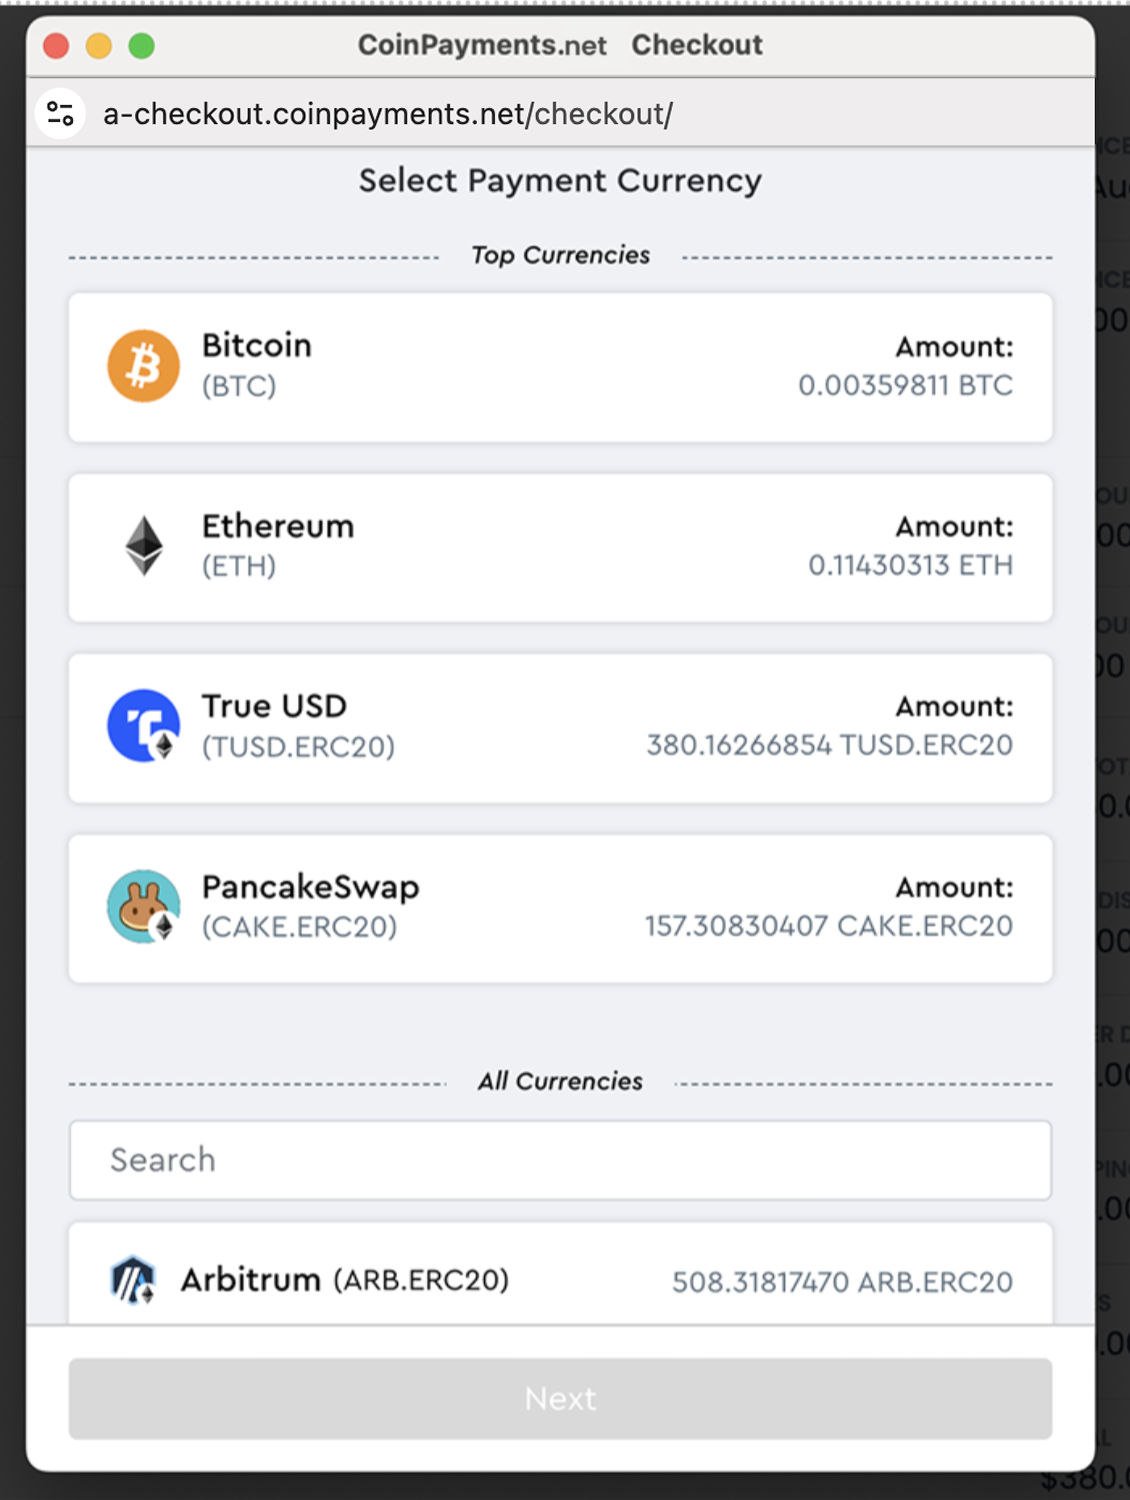
Payment Currency Selection:
At the checkout step, buyers choose from multiple cryptocurrency options, each with accurate conversion rates for the order amount, giving the flexibility to pay with the currency of their choice.
CoinPayments locks crypto rates for one hour, ensuring price stability during the payment process.
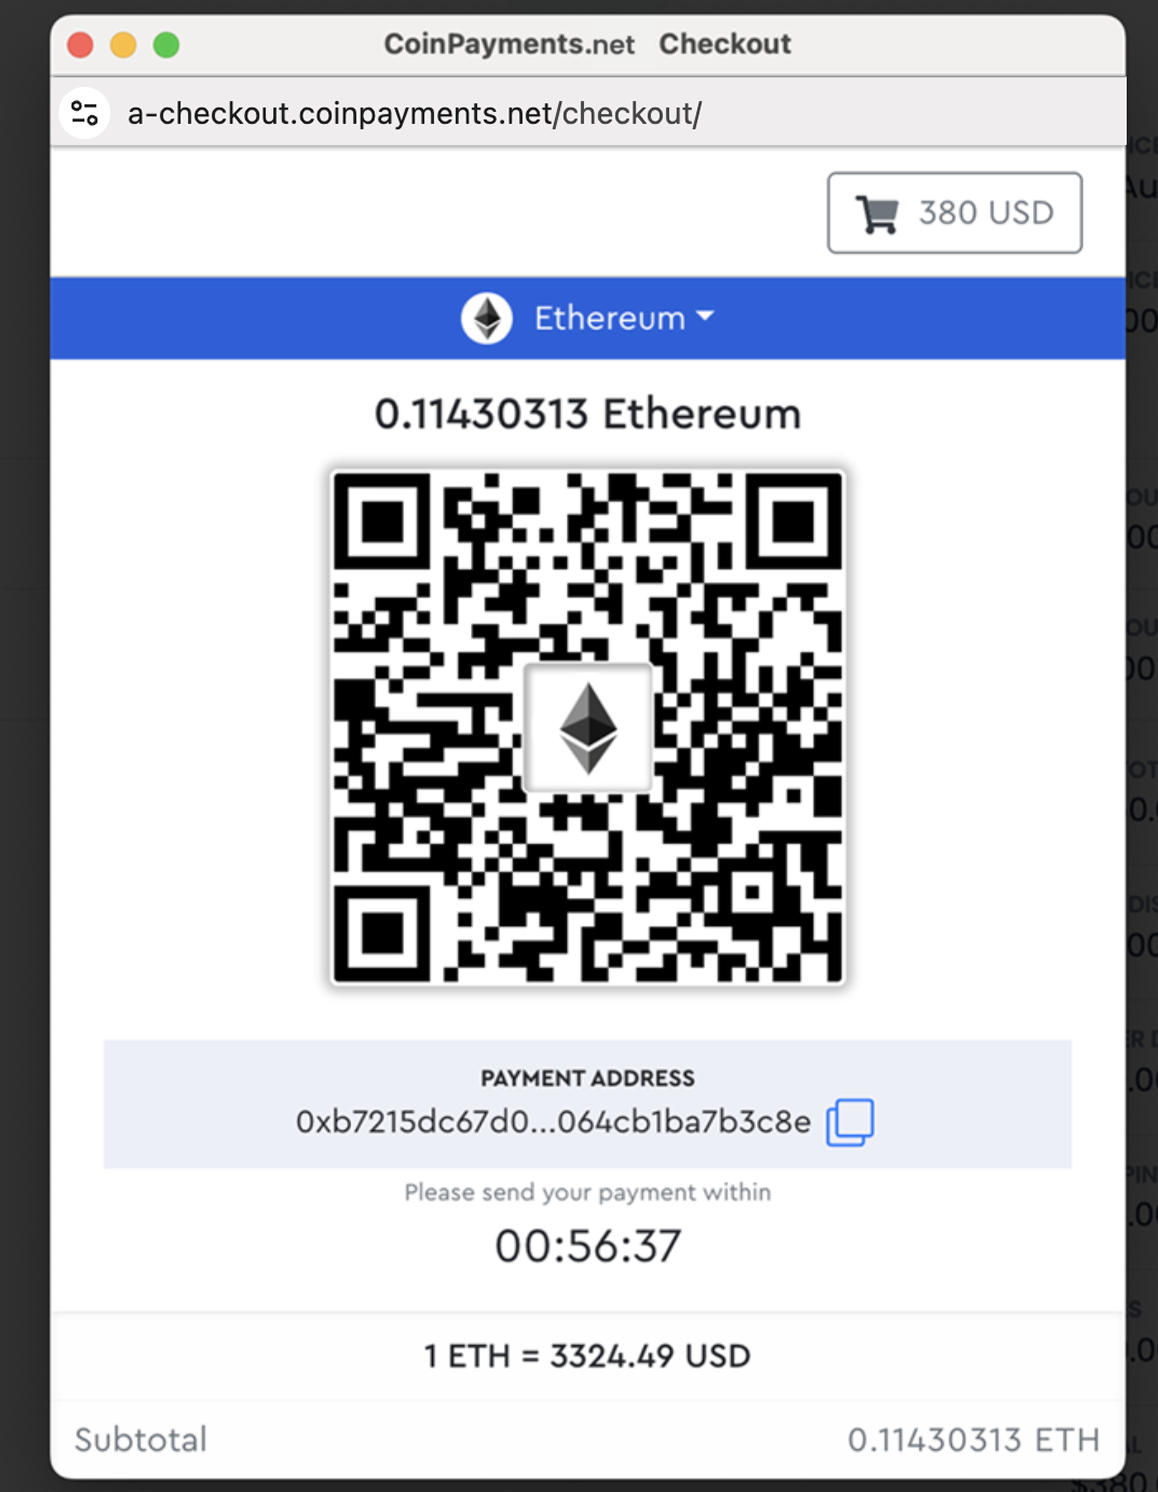
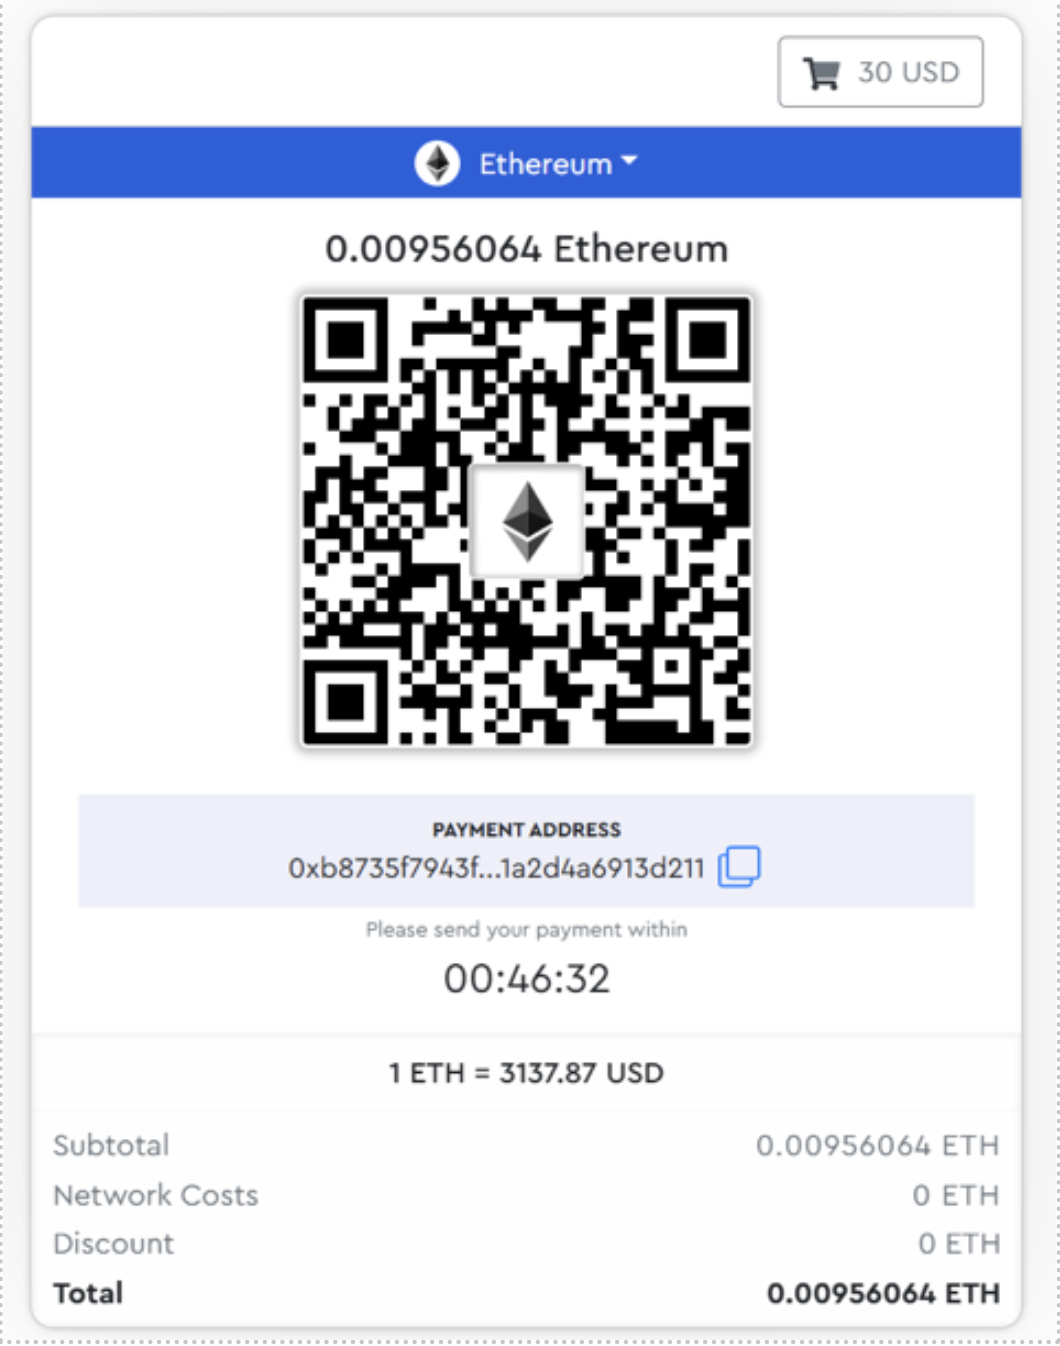
Payment Completion:
Buyers can make payments by scanning the provided QR code or copying the temporary payment address.
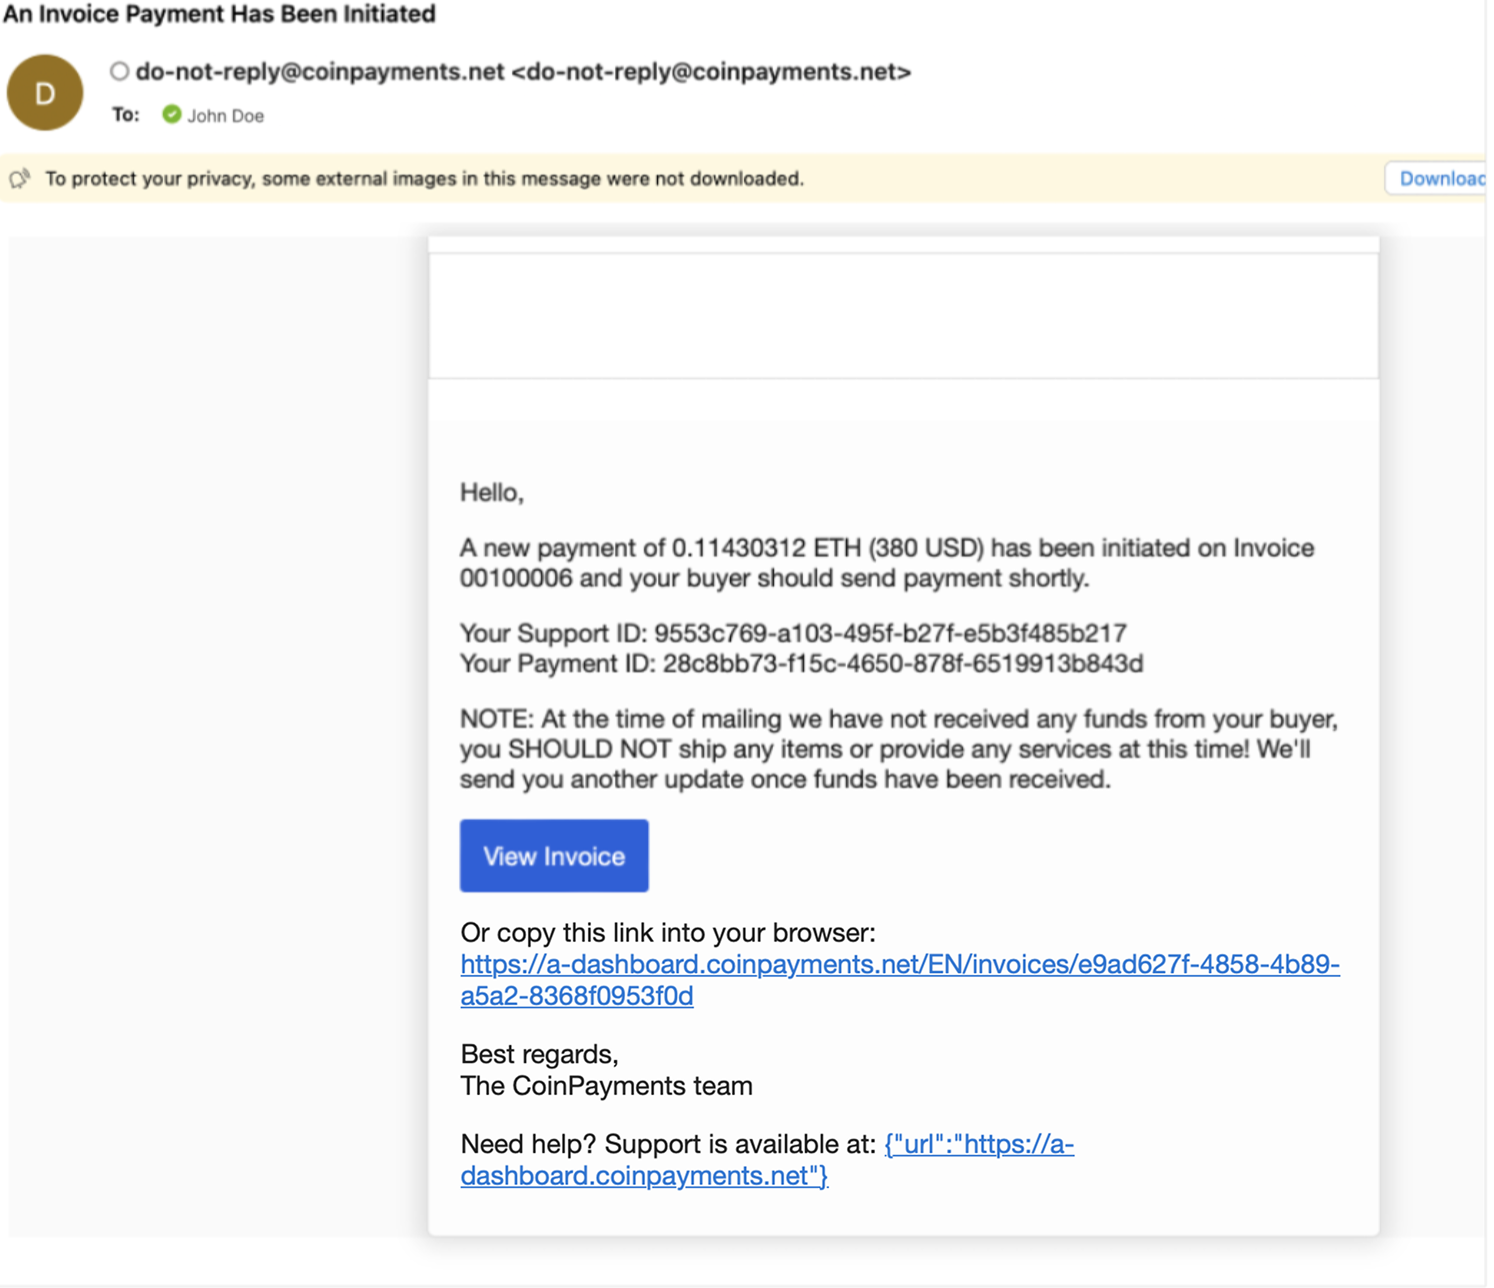
Email notifications update you and the buyer on the payment status, including confirmation.
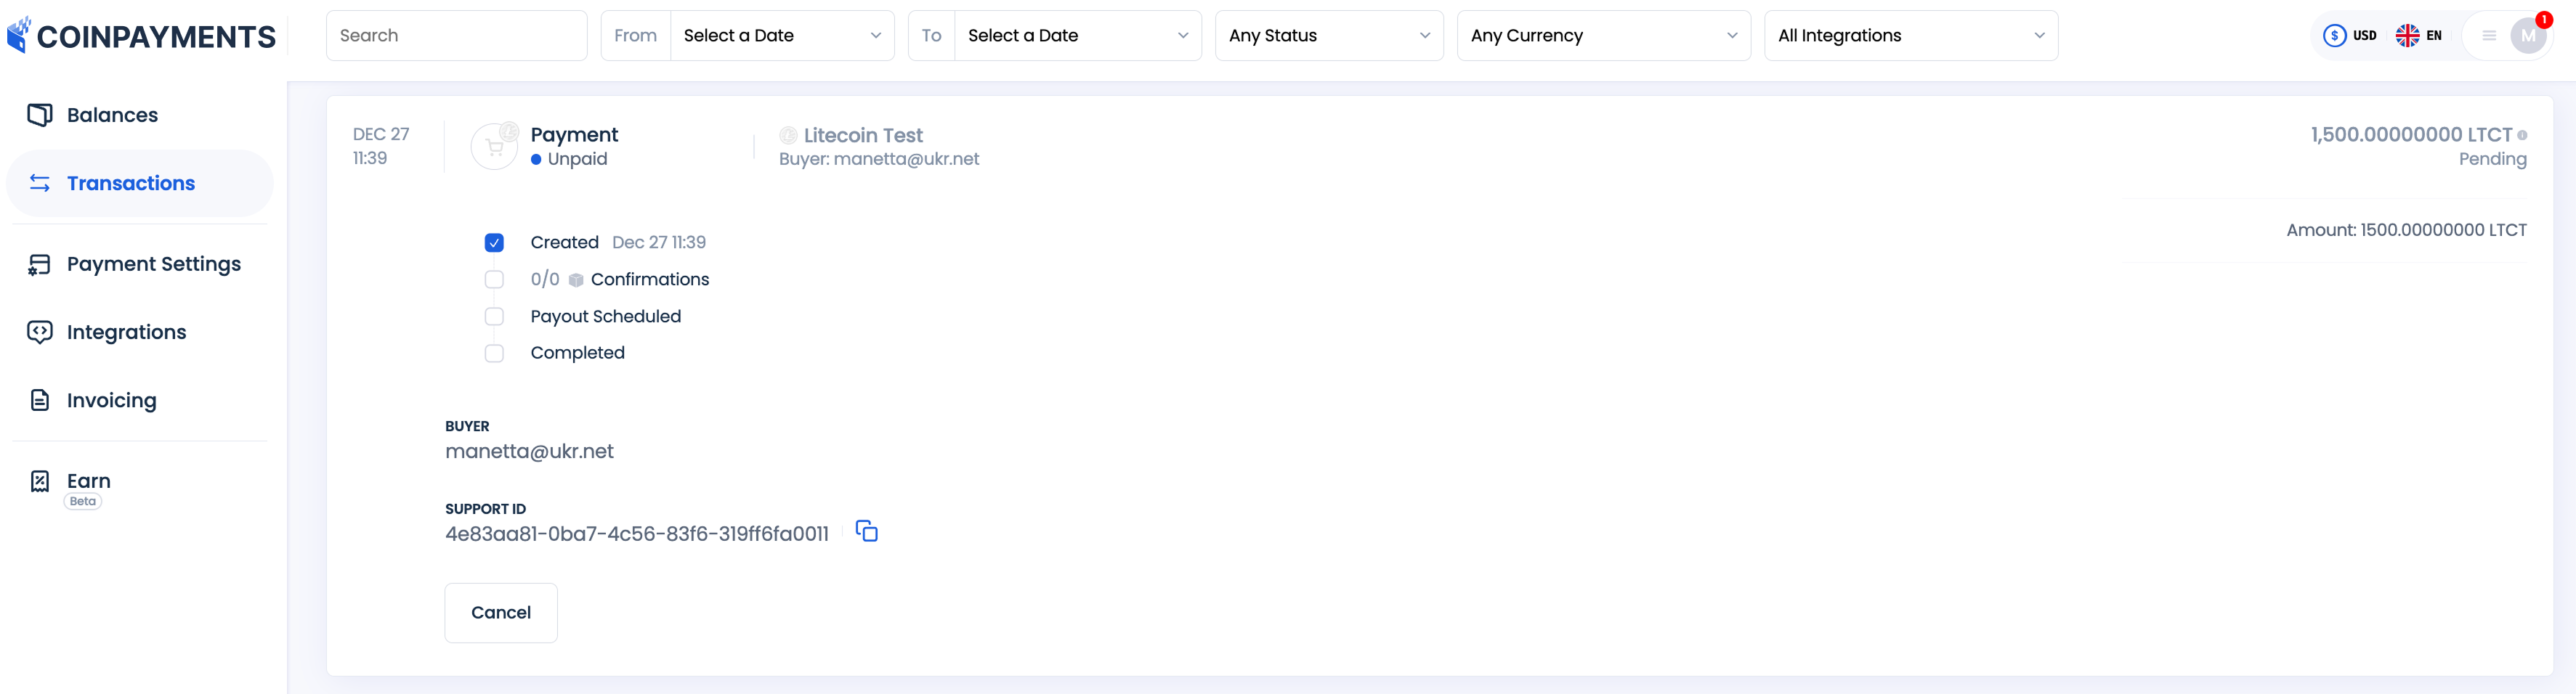
Transaction Monitoring:
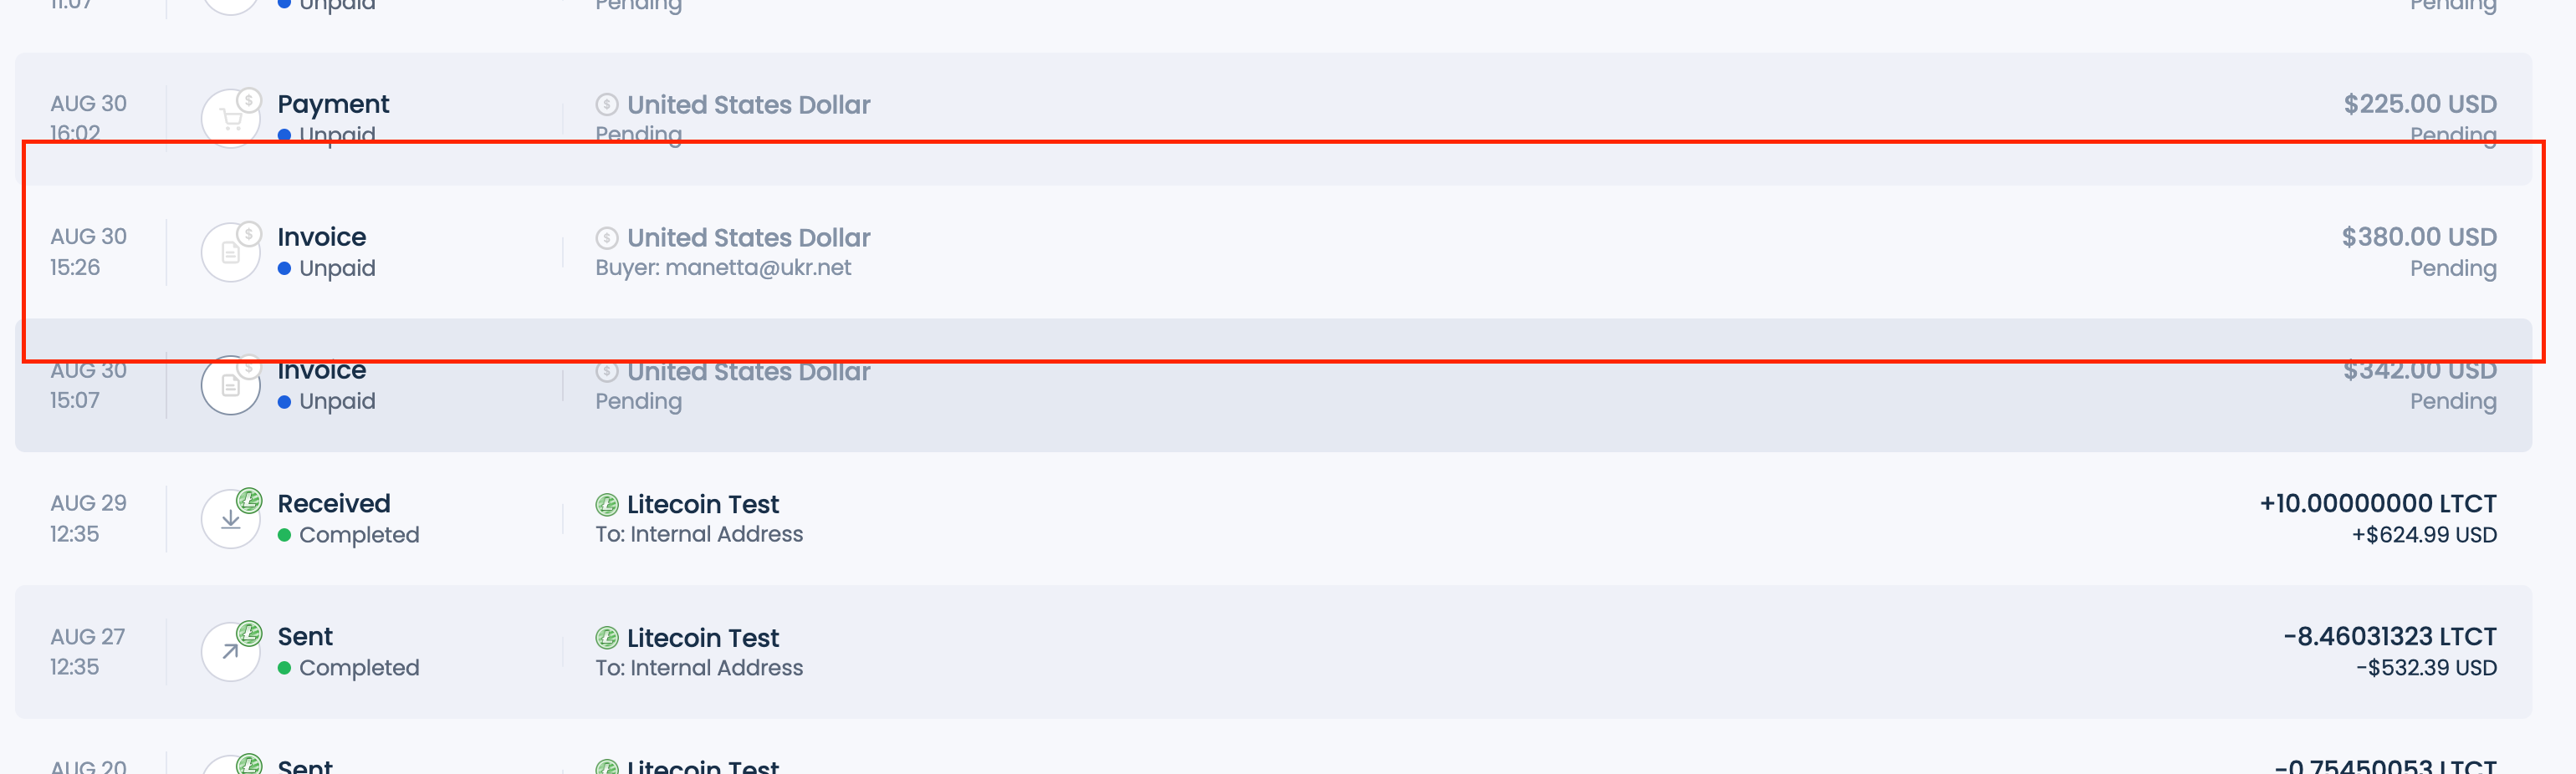
Check the Transactions section to track the payment status, even before full blockchain confirmation.
Note: Transactions generated via the CoinPayments Invoicing Tool or Plugins are categorized as “Invoice”, while those generated using Payment Buttons are categorized as “Payment” in your transaction history.
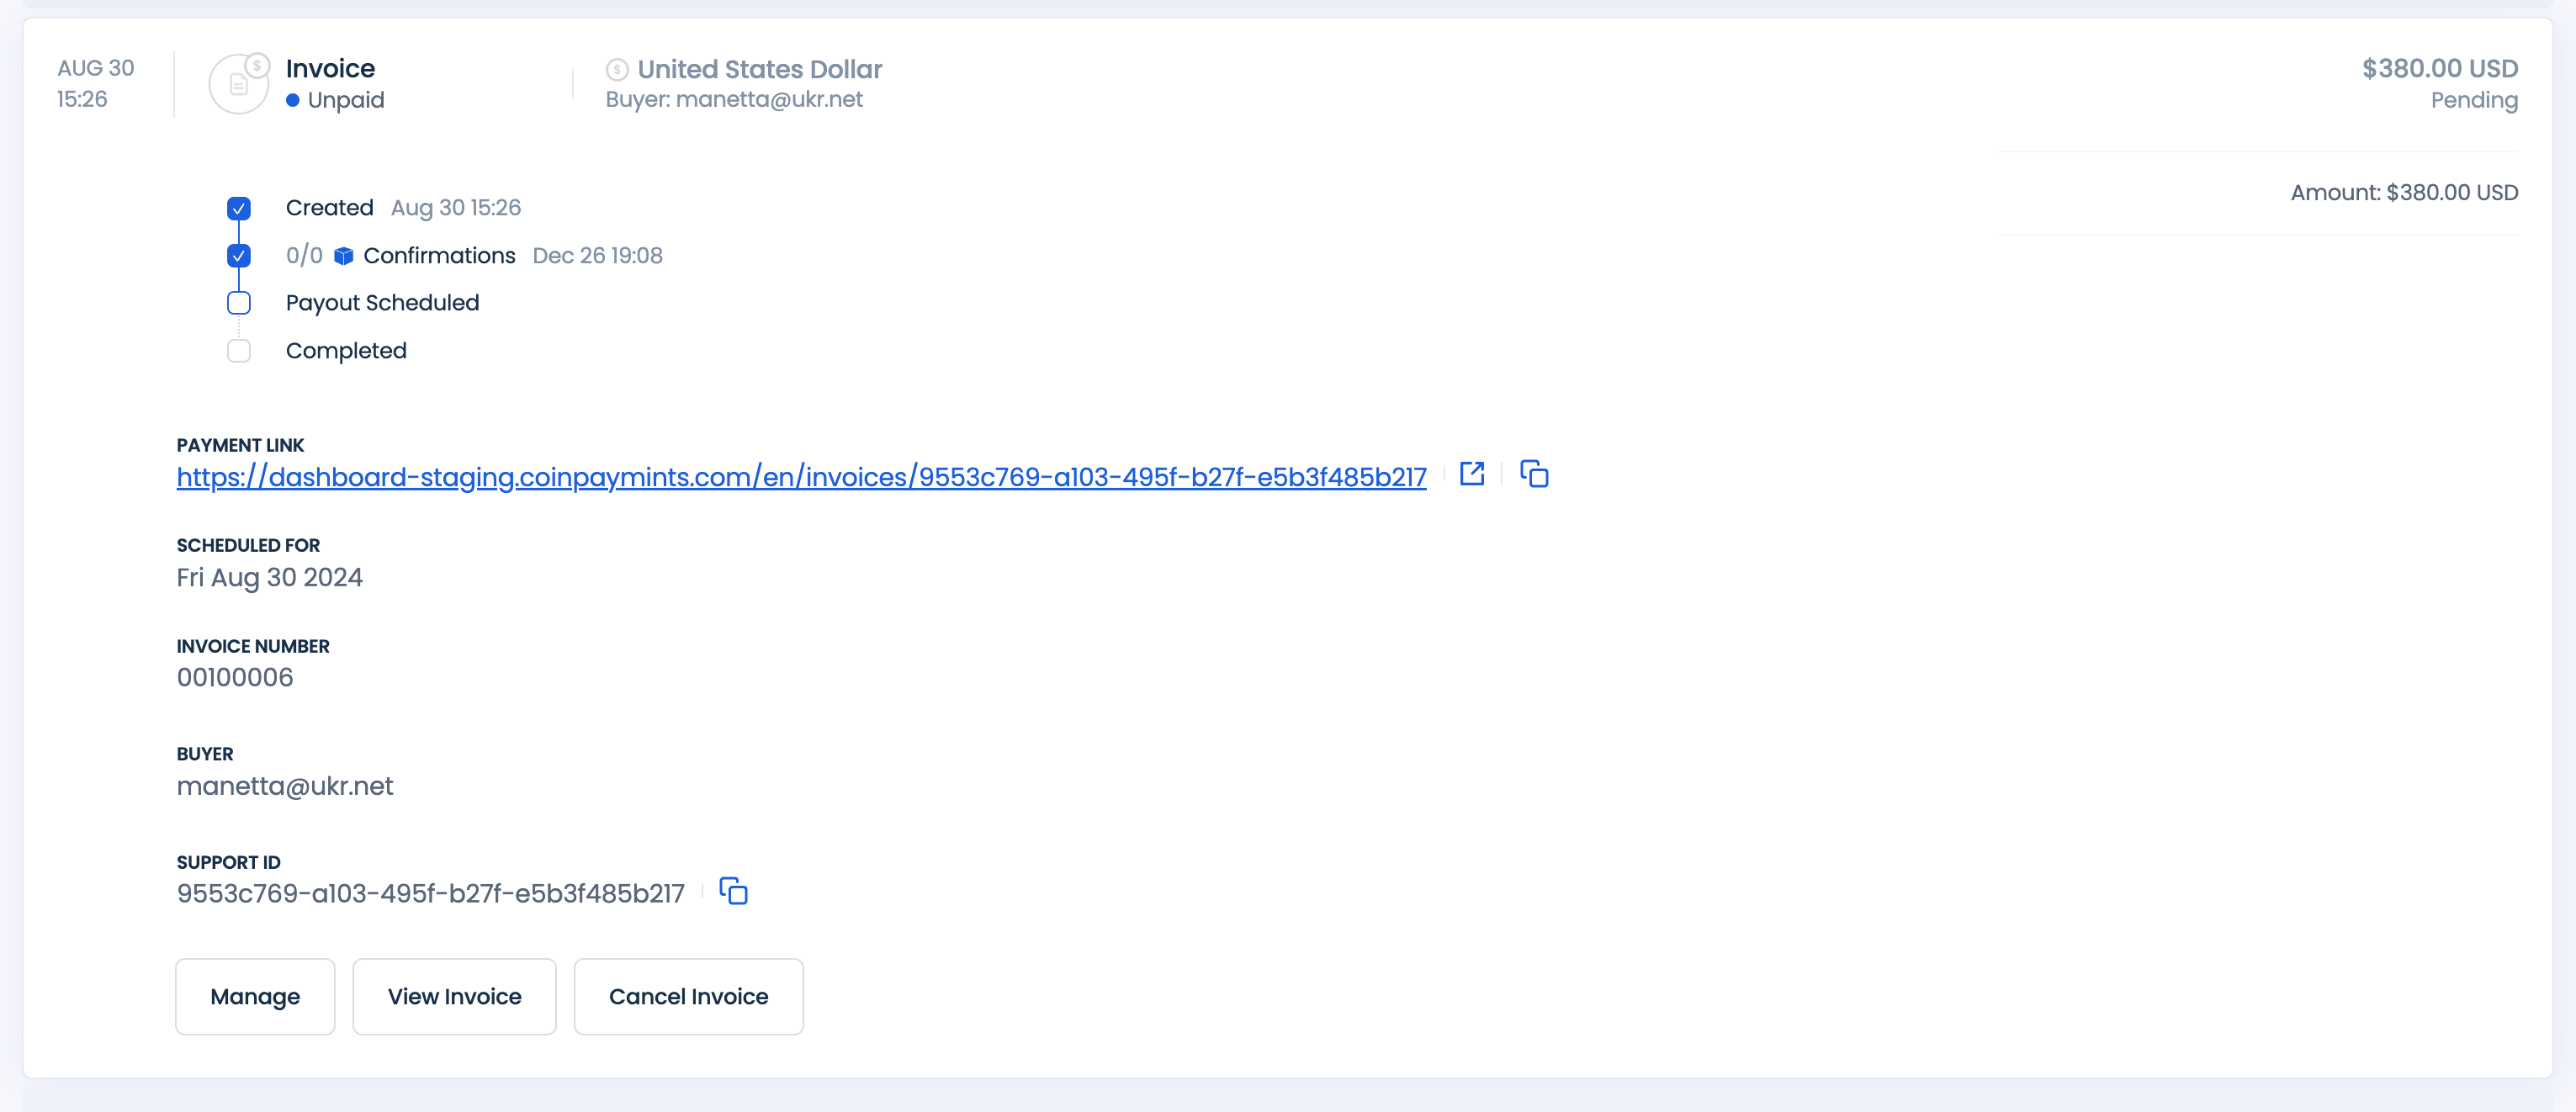
You can also check more detailed information about the invoice/payment by clicking on the transaction.
Checkout for API-Generated Invoices and Payment Buttons
The CoinPayments API offers powerful tools for businesses to automate payment processing. Using API-generated invoices and payment buttons, you can integrate seamless checkout flows tailored to specific use cases, such as subscription models or online purchases.
Use Case: Subscription Payments with API-Generated Invoices
Let us consider a subscription use case, where you have a platform that provides services with a subscription payment model. Every month you need to send out invoices to your users with the reminder to pay for the subscription and ability to collect this payment in crypto.
CoinPayments API can automate the invoicing process. Here’s how it works:
Customer details (e.g., name, payment address, and email, if available).
Cost of services.
Exclude Certain Attributes:
When creating the invoice, ensure that the payment object together with paymentCurrency and refundEmail attributes are excluded unless whitelabeling is required.
As a response to the createInvoice endpoint, you will receive:
An Invoice ID to check status updates.
A link to the invoice document with the active Pay Using CoinPayments button, directing customers to the payment checkout flow.
Share the Invoice:
Share the invoice link with the customer, or if email delivery is enabled, they will receive the link automatically via email.
Additionally, as a response to the createInvoice endpoint, you will receive a direct link to the checkout flow, which you can share with customers if you prefer not to send the full invoice document.
Track Payment Status:
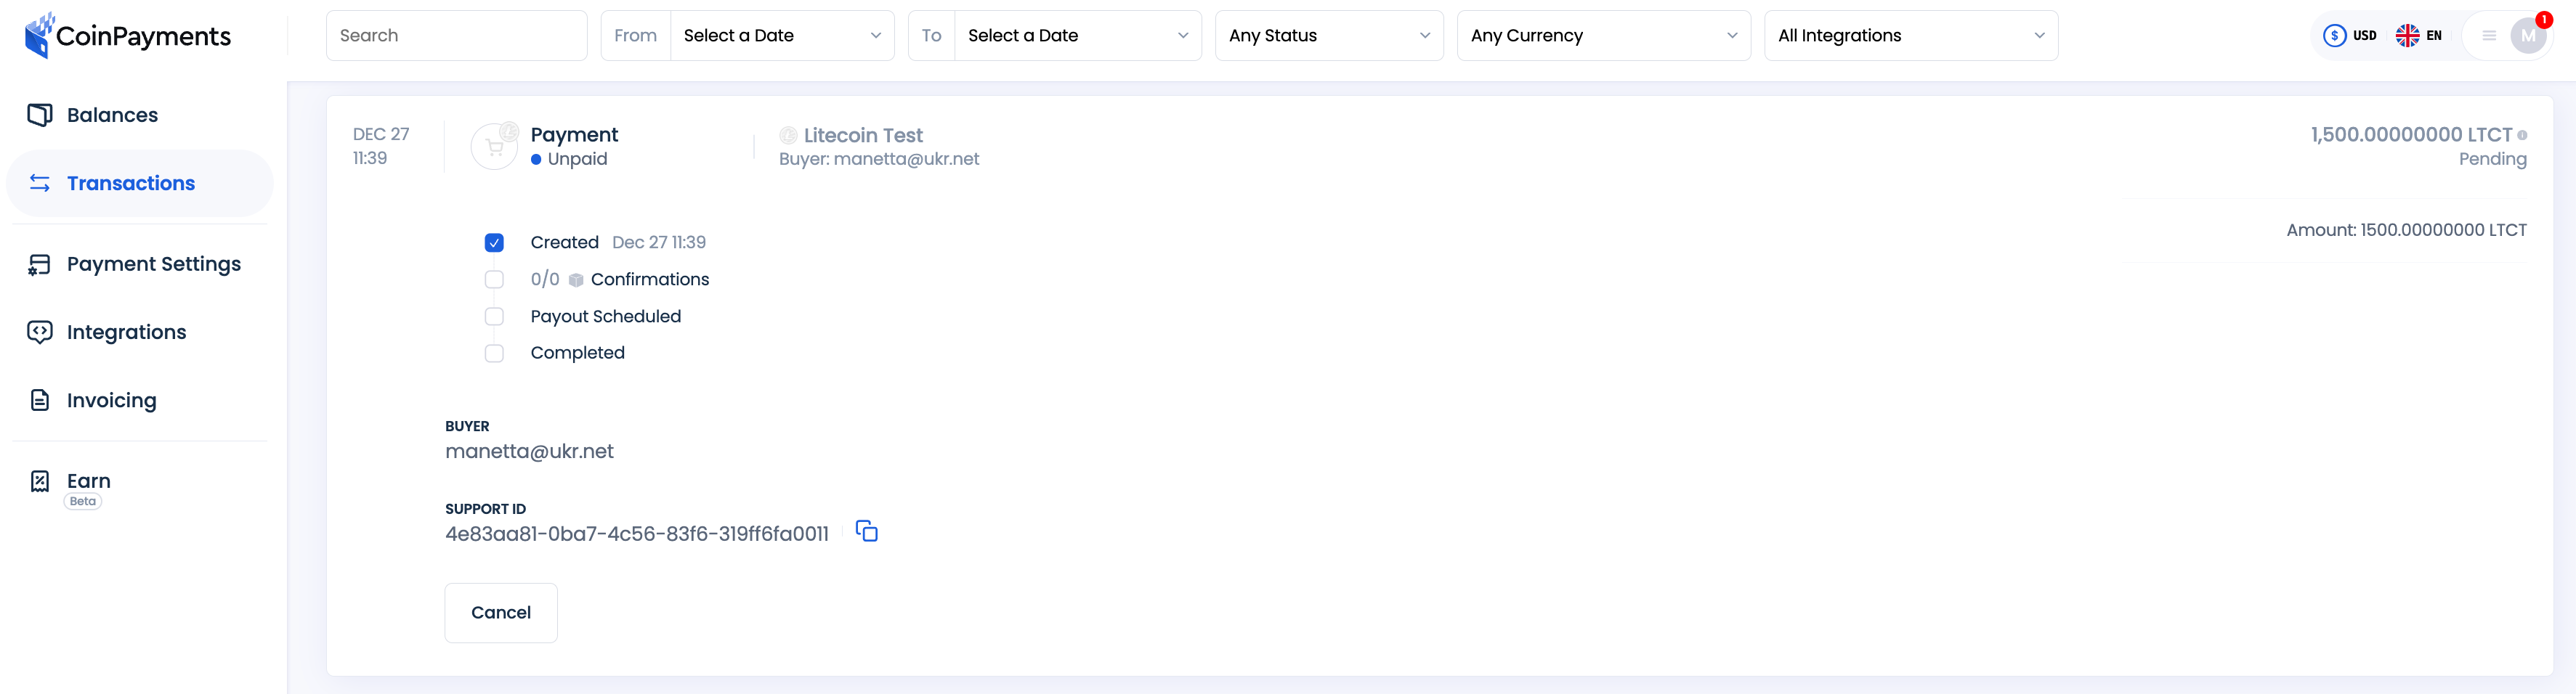
Use the Transactions section to monitor the invoice status (transaction type: “Payment”).
If webhooks are enabled, receive real-time notifications for status changes such as:
invoiceCreated
invoicePending
invoicePaid
invoiceCompleted
invoiceCancelled
invoiceTimedOut
Checkout for API-Generated Payment Buttons
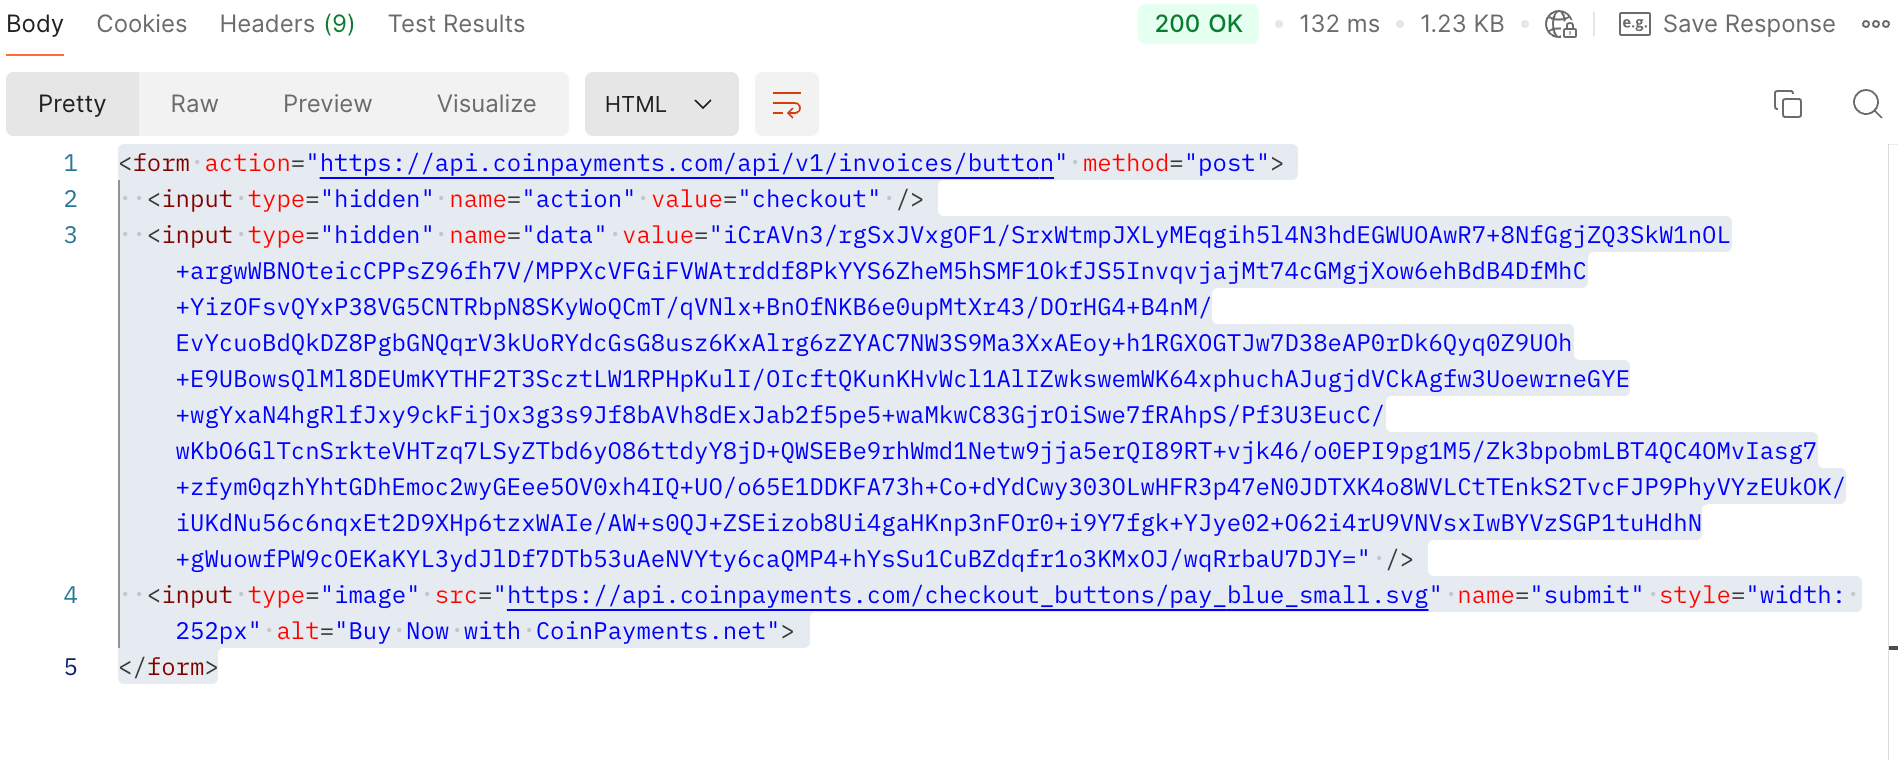
Let us consider another case. Imagine you run an online shop and want to accept crypto payments for your goods or services. To make the process quick and seamless for your clients, you can add a Buy-Now button next to each item. Using the CoinPayments API, you can enable your clients to complete their purchases with just a few clicks. Here’s how the process works:
Copy and paste the generated HTML code into your website where you want the Buy-Now button to appear.
When open via browser, the code above will display a button
Payment Flow:
When clients click the Buy-Now button, they are redirected to the CoinPayments checkout page to complete the transaction.
Track Payment Status:
The payment will be logged in the Transactions section of your CoinPayments dashboard with the type marked as “Payment“.
If webhooks are set up, you’ll receive notifications for each payment status update (e.g., invoiceCreated, invoicePending, invoicePaid, invoiceCompleted, etc.).
White-labeled Checkout
The Whitelabeled Checkout Flow allows you to fully customize the payment process using the CoinPayments API, enabling you to offer a branded experience on your platform. This method is ideal for businesses that want to keep the checkout process entirely within their own ecosystem.
Custom Checkout for Online Stores
For an online shop accepting cryptocurrency payments, the White-labeled Checkout Flow ensures that your customers can browse, shop, and pay without leaving your branded environment. Here’s how it works:
Customer Initiates Checkout:
Your customer selects products/services, adds them to the cart, and proceeds to checkout.
At checkout, they provide details like name, shipping method, payment address, and email, then click Pay.
Generate an Invoice:
Use the createInvoice endpoint and include the customer’s email as the RefundEmail for handling overpayments or refunds:
‘invoiceId’ to get payment address and check payment status
A list of supported payment currencies, amounts, and fees.
A payment expiration timestamp.
Generate a Payment Address:
When the customer selects their payment currency, use the getPaymentAddressByCurrency endpoint to generate a payment address for the selected currency.
Provide Payment Details:
As a result, buyer is presented with the following data:
The indication of the cryptocurrency id will trigger creation of the invoice together with payment and HotWallet (address for buyer). In the ‘createInvoice’ response you will receive a link to the CoinPayments checkout app:
Alternatively, if webhooks are set up, CoinPayments will notify you of status changes (e.g., invoiceCreated, invoicePending, invoicePaid, invoiceCompleted, etc.).
Commercial Deposits and Balances
Commercial deposits allow merchants to receive funds for services such as subscription payments or gambling accounts. With CoinPayments API, merchants can manage and sweep these deposits using various types of addresses tailored to their specific needs.
Types of Commercial Addresses
CoinPayments provides flexibility in managing commercial funds through three types of addresses: UTXO Addresses, Temporary Account-Based Addresses, and Permanent Account-Based Addresses. Each address type caters to different business needs, offering options for fund management, fee optimization, and customer-specific deposits.
UTXO addresses
UTXO (Unspent Transaction Output) addresses are designed for accumulating funds and minimizing network fees by allowing bulk withdrawals. They are particularly beneficial for merchants who process large volumes of transactions or manage multiple customer accounts.
UTXO addresses can be permanently assigned to a merchant or specific customer for ongoing use, ensuring seamless fund management without additional reassignment.
By consolidating transactions into bulk withdrawals, UTXO addresses significantly reduce service and network fees.
UTXO addresses created through the API are considered permanent addresses, offering long-term flexibility for businesses managing commercial deposits.
Temporary Account-based addresses
A temporary address is an address that is not specifically assigned to any user of the CoinPayments platform. Such address exists in CoinPayments pool of addresses and is temporarily used for a particular commercial deposit.
CoinPayments randomly issues temporary addresses when a merchant requests a deposit in a particular currency.
These addresses remain assigned to the merchant for a set period set by CoinPayments before returning to the pool. The lease period is automatically renewed if a deposit is made within this timeframe.
Funds deposited to temporary addresses are automatically consolidated into the merchant’s corresponding wallet balance.
Since these addresses are not permanently assigned, customers must verify the correct address before sending funds to merchants.
CoinPayments does not charge fees for consolidating funds from temporary addresses into the wallet balance.
Permanent Account-Based Addresses
The merchant can decide to use permanent account-based addresses if it is important to manage funds/balances deposited by their customers individually.
Permanent addresses are assigned to specific clients indefinitely, enabling merchants to track individual deposits and balances more efficiently.
Balances are always swept in full to minimize the chances of small, unwithdrawable amounts being left due to network fees.
The tradeoff of the permanent address vs. temporary address design is fees. To be able to use the funds from permanent addresses, merchant must consolidate addresses balances at some wallet balance of the currency. For this each new commercial address created within the API wallet must be activated.
A one-time activation fee is charged during the first withdrawal to consolidate funds from the address to the primary wallet.
Subsequent withdrawals incur standard network (transfer) fees.
Although the initial activation fee may result in higher upfront costs, repeated withdrawals from consolidated balances are more economical compared to withdrawals from temporary addresses.
Merchants can decide when to sweep funds from permanent addresses to their wallet balance.
Consolidation ensures that funds are available for further use while optimizing costs.
Simplify Commercial Wallet Top-up
A common case for merchants is to use wallets and addresses created via API for receiving payments from customers, e.g. top-up a subscription or casino account. You can simplify the deposit process for the customer by incorporating transaction details such as deposit amount, currency, and address into a QR code. This will decrease the possibility of an error when sending funds.
Below is an example script you can use to generate a QR code for deposits:
Receive Commercial Deposits and Sweep Funds from UTXO Addresses
UTXO (Unspent Transaction Output) addresses are highly efficient for managing commercial deposits due to their ability to accumulate funds and minimize network fees. Below is the process for setting up and using UTXO addresses for commercial deposits.
Create an API Wallet:
Use the createWallet API endpoint to create an API wallet for the currency you want to accept or use an existing wallet.
Ensure that the usePermanentAddresses attribute is set to false when creating a new wallet.
Once funds are received, you can sweep them without additional effort right from the wallet balance by creating a withdrawal using the createSpendRequest endpoint.
Note: You can choose to convert funds during the withdrawal process if required.
Receive Commercial Deposits and Sweep Funds from Temporary Addresses
The flow for receiving deposits to the temporary account-based addresses and withdrawing funds from account-based wallets is the same as for UTXO addresses. Although, there are a few things to note:
Temporary addresses stay assigned to the wallet by default for the period of 7 days (address lease period). Once this time period expires, the address returns to the CoinPayments pool of addresses.
In case a customer makes at least one deposit to the same address within the address lease period, the lease period renews for another 7 days.
Received funds are automatically consolidated into the balance of the wallet the address is assigned to at that moment. That’s why it is important that customers check which address they send funds to.
CoinPayments charges no fees for consolidating funds from temporary addresses at the wallet balance.
When withdrawing funds from such wallet, you pay only one network fee which is significantly lower compared to withdrawing funds from a number of regular account-based addresses.
Receive Commercial Deposits and Sweep Funds from Permanent Addresses
Permanent account-based addresses offer merchants the ability to manage individual customer balances with a higher level of control. These addresses are assigned to specific customers indefinitely, making them suitable for businesses that need to track deposits and balances for each customer separately.
Below is the process to Use Permanent Account-Based Addresses
Initially, the address is inactive and although it can receive funds, it requires activation before funds can be swept from it.
Address activation requires activation fee. Address activation takes place within the address consolidation process that will be described further.
Share Address Details:
Provide the generated address or a QR code to customers for deposits.
Monitor Deposits:
Once customer sends funds to an address, use the getTransactions API endpoint to track deposits and confirm successful transactions.
Activate and Consolidate Funds:
Once you are ready to sweep funds from the permanent addresses, you first need to consolidate the funds from the addresses at the wallet of the same currency that does not own permanent addresses (either Primary (UI) Balance of the currency or any other API wallet of the same currency within your account that has usePermanentAddresses attribute set to false).
You have two options to consolidate addresses:
a. Use the createWalletConsolidation API endpoint to consolidate funds from the addresses that belong to one API wallet into a wallet balance. You can consolidate funds to the balance of the wallet where the addresses belong or to any other wallet of the same currency within your account:
as walletIdStr path parameter indicate the API wallet which addresses you want to consolidate
as toWalletIdStr path parameter indicate the API wallet where funds from the addresses should be consolidated. If not provided, funds will be consolidated to the Primary Balance of the currency.
as addressIds query parameters indicate the addresses corresponding to walletIdStr that should be consolidated
NOTE: Before actually executing the consolidation you have an opportunity to make a preview of the expected consolidation results by using getWalletConsolidation API endpoint. The result will provide you the breakdown of all fees associated with the consolidation of all the addresses within the wallet and the final amount to be consolidated on the wallet balance. You can use this endpoint to decide which addresses to consolidate to make the sweep most cost-effective.
b. Use the createWalletsConsolidation API endpoint to consolidate funds from the addresses that belong to different API wallets of the same currency into a single wallet balance. You can consolidate funds to the balance of any wallet of the same currency within your account:
as toWalletIdStr path parameter indicate the API wallet where funds from the addresses should be consolidated. If not provided, funds will be consolidated to the Primary Balance of the currency.
as walletId and addresses request body attributes indicate wallets and their addresses that should be consolidated
NOTE: Before actually executing the consolidation you have an opportunity to make a preview of the expected consolidation results by using createWalletsConsolidationPreview API endpoint. The preview result will provide you the breakdown of all fees associated with the consolidation and the final amount to be consolidated on the wallet balance. You can use this endpoint to check whether the consolidation outcome is what you actually expect and if any adjustments to the list of addresses to be consolidated is necessary to make the sweep most cost-effective.
Fees During Consolidation
Activation Fee:
For newly created, inactive addresses, an activation fee is charged during the first consolidation.
This fee applies to enable withdrawals from the permanent address for the first time.
Transfer Fee:
Every time funds are consolidated (regardless of whether the address is already activated), a Transfer Fee is applied for sweeping funds from permanent addresses to the wallet balance.
Already Activated Addresses:
No activation fee is charged for addresses that have already been activated in a previous consolidation.
During withdrawal, you have the option to convert the funds into another currency. To convert funds, specify destination currency id as toCurrency request body attribute of the spend request.
To make a simple withdrawal without conversion toCurrency must be the same as the currency of the walletIdStr path parameter.
Manage Commercial Balances via Dashboard UI
How to Move Funds from Primary Balance to API Balance
CoinPayments separates funds between the Primary balance and API balances to enhance flexibility and security. This separation allows businesses to efficiently manage funds for different purposes while maintaining strict control over access.
Primary Balance: Funds stored here can only be accessed through the Dashboard UI and are not available via API.
API Balances: Funds in API wallets are accessible only through the API integration under which they were created, but they can also be viewed via the Dashboard UI.
This approach provides several key benefits:
Developers have no access to the main business funds stored in the Primary balance.
Developers can only manage funds specifically assigned to API wallets, ensuring limited exposure to sensitive funds.
Businesses can quickly allocate and top up API wallet balances for specific purposes, such as project budgets or operational expenses.
In this tutorial you will learn how to top up your API balance via Dashboard UI.
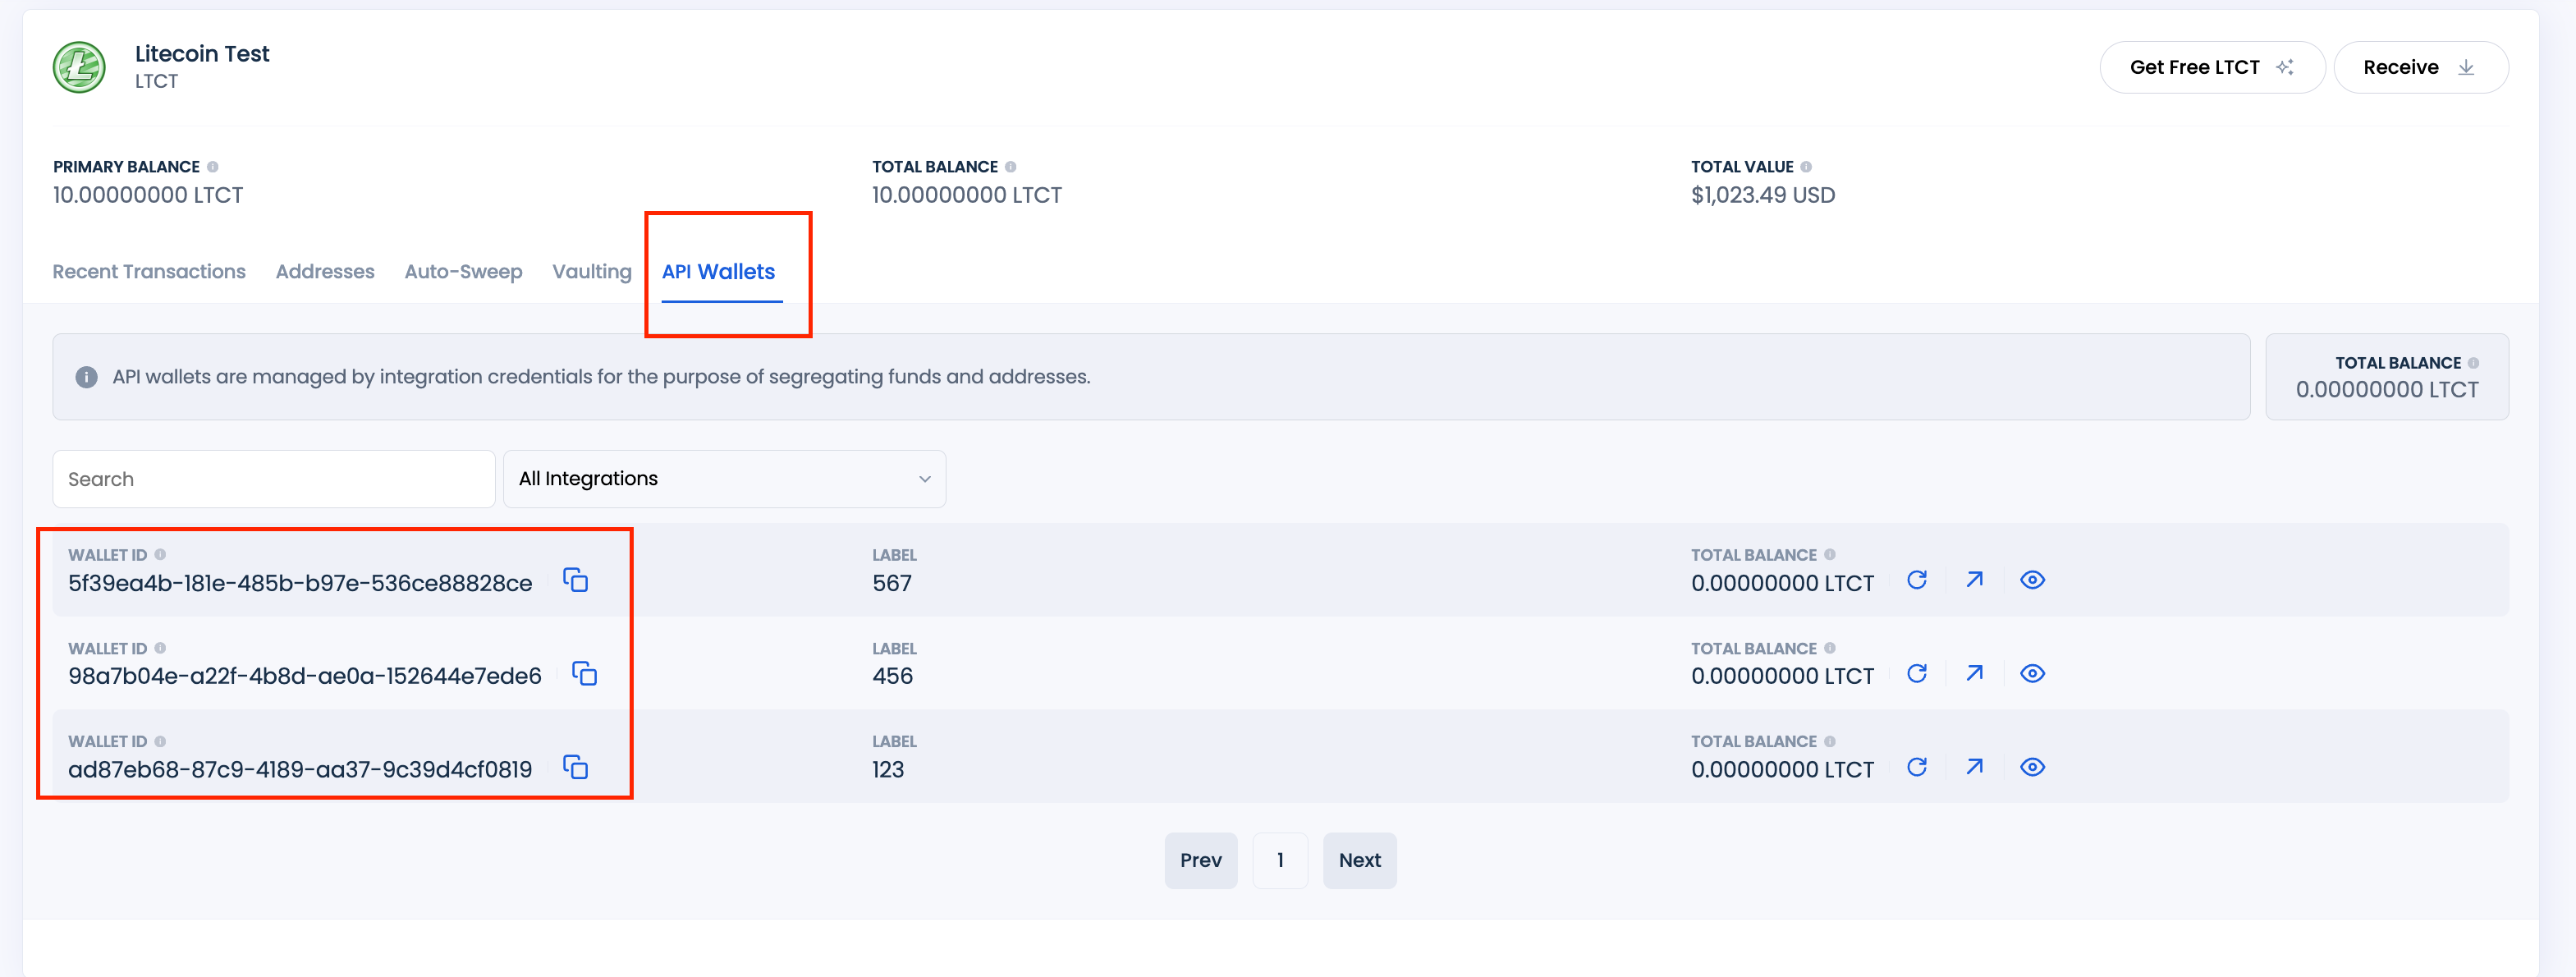
Once created, the wallet will appear under the API Wallets tab in your Primary balance for that currency.
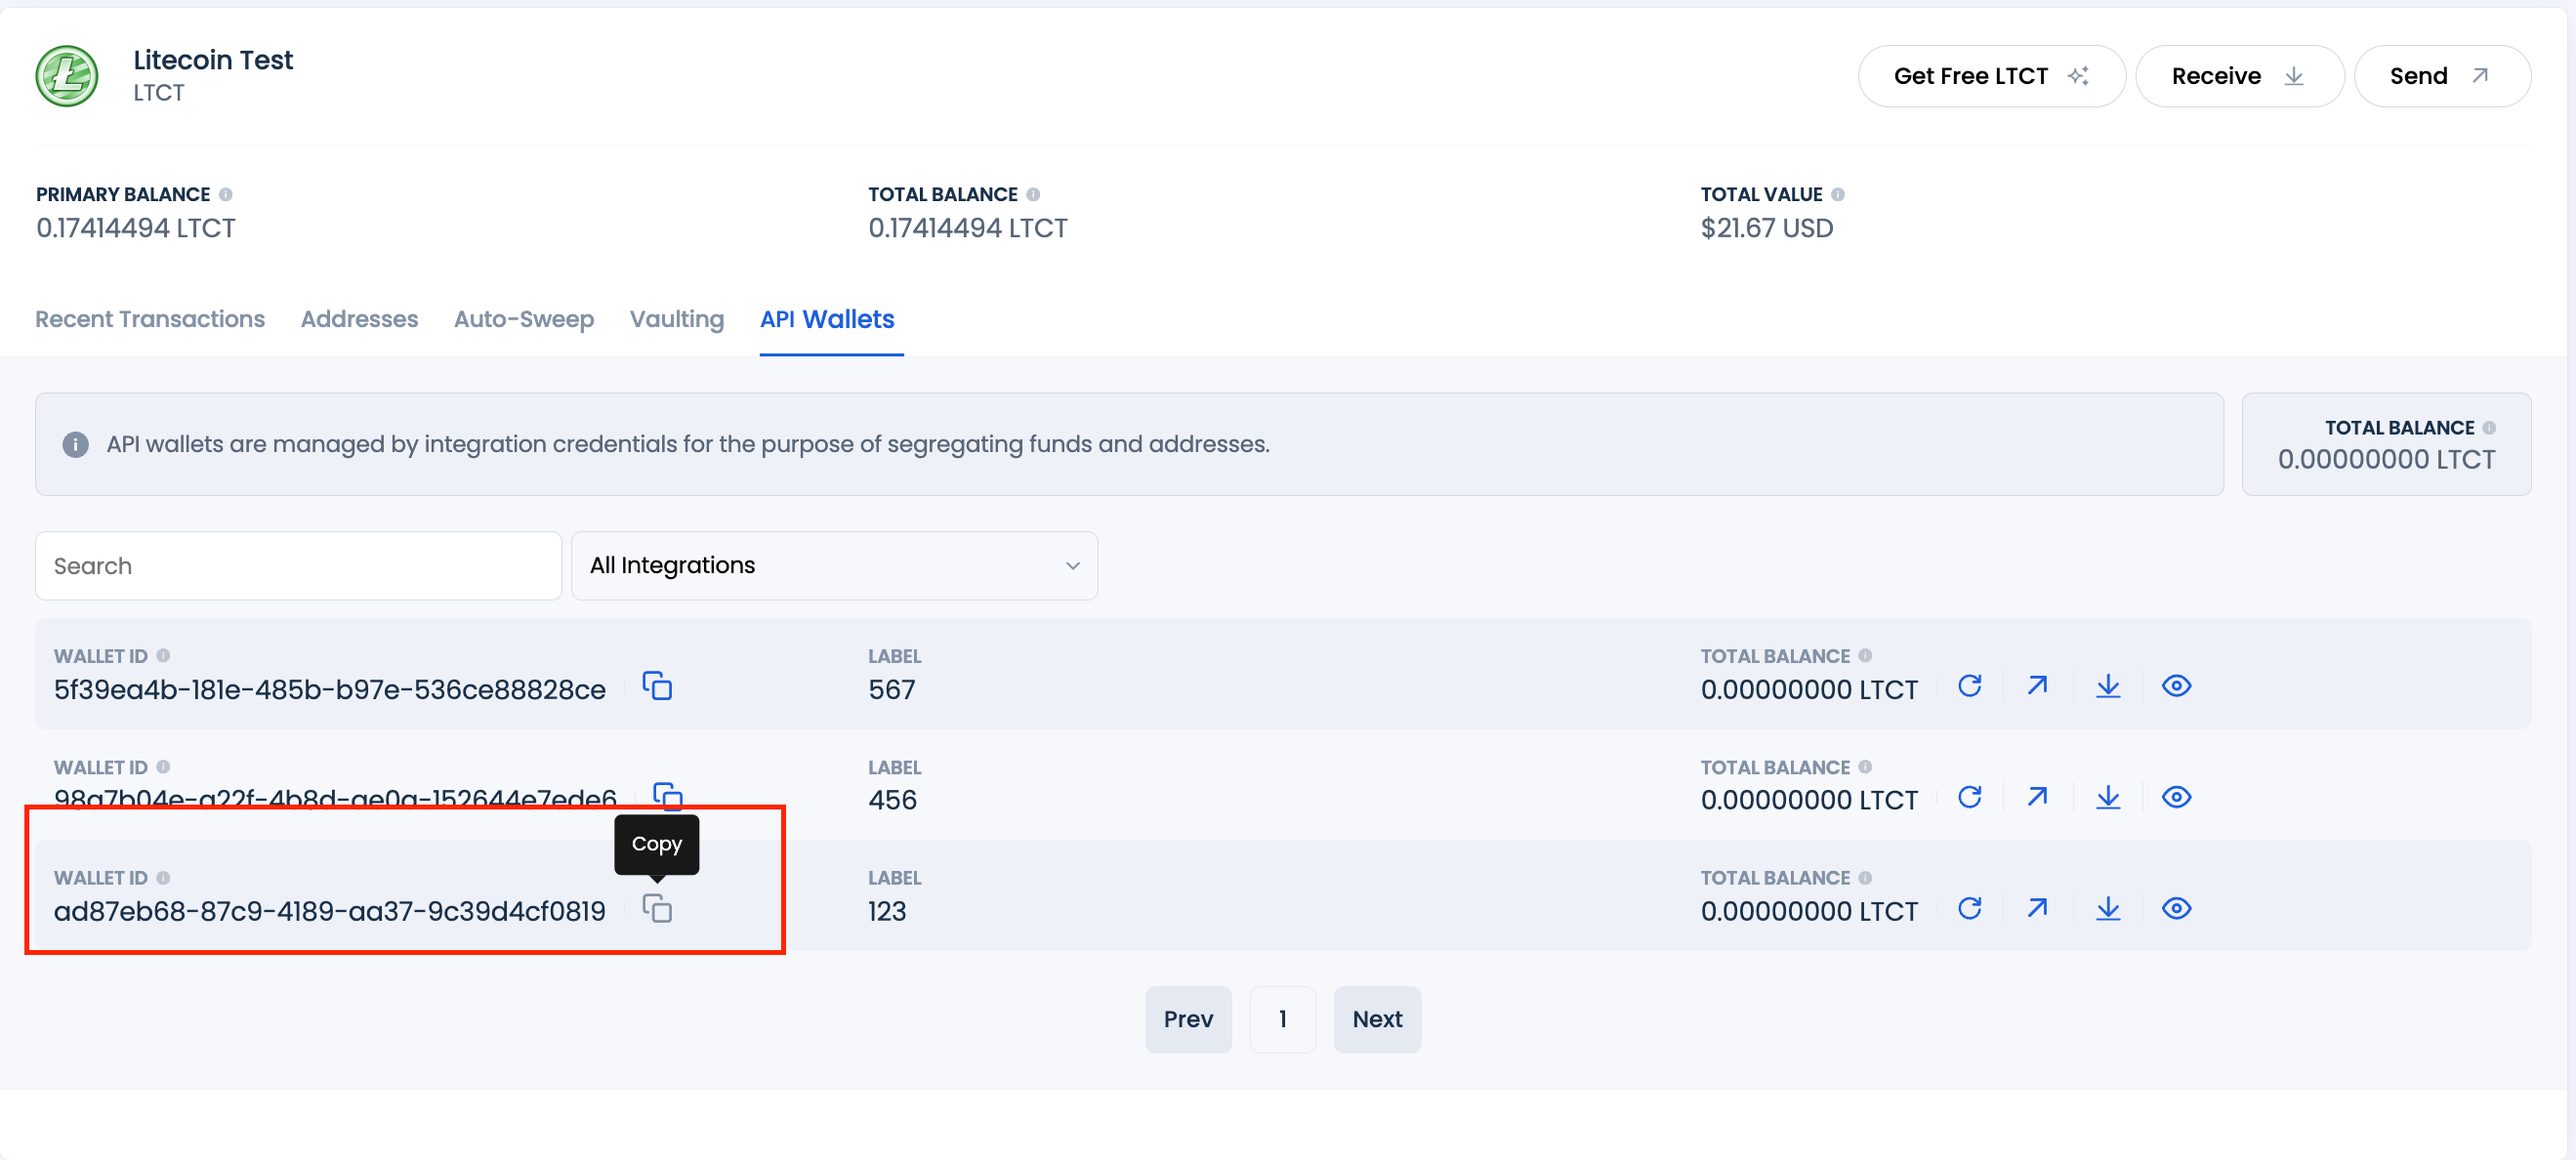
Copy the API Wallet ID:
For UTXO or account-based addresses with temporary wallets, copy the API wallet ID from the API Balances tab to deposit money from the Primary Balance.
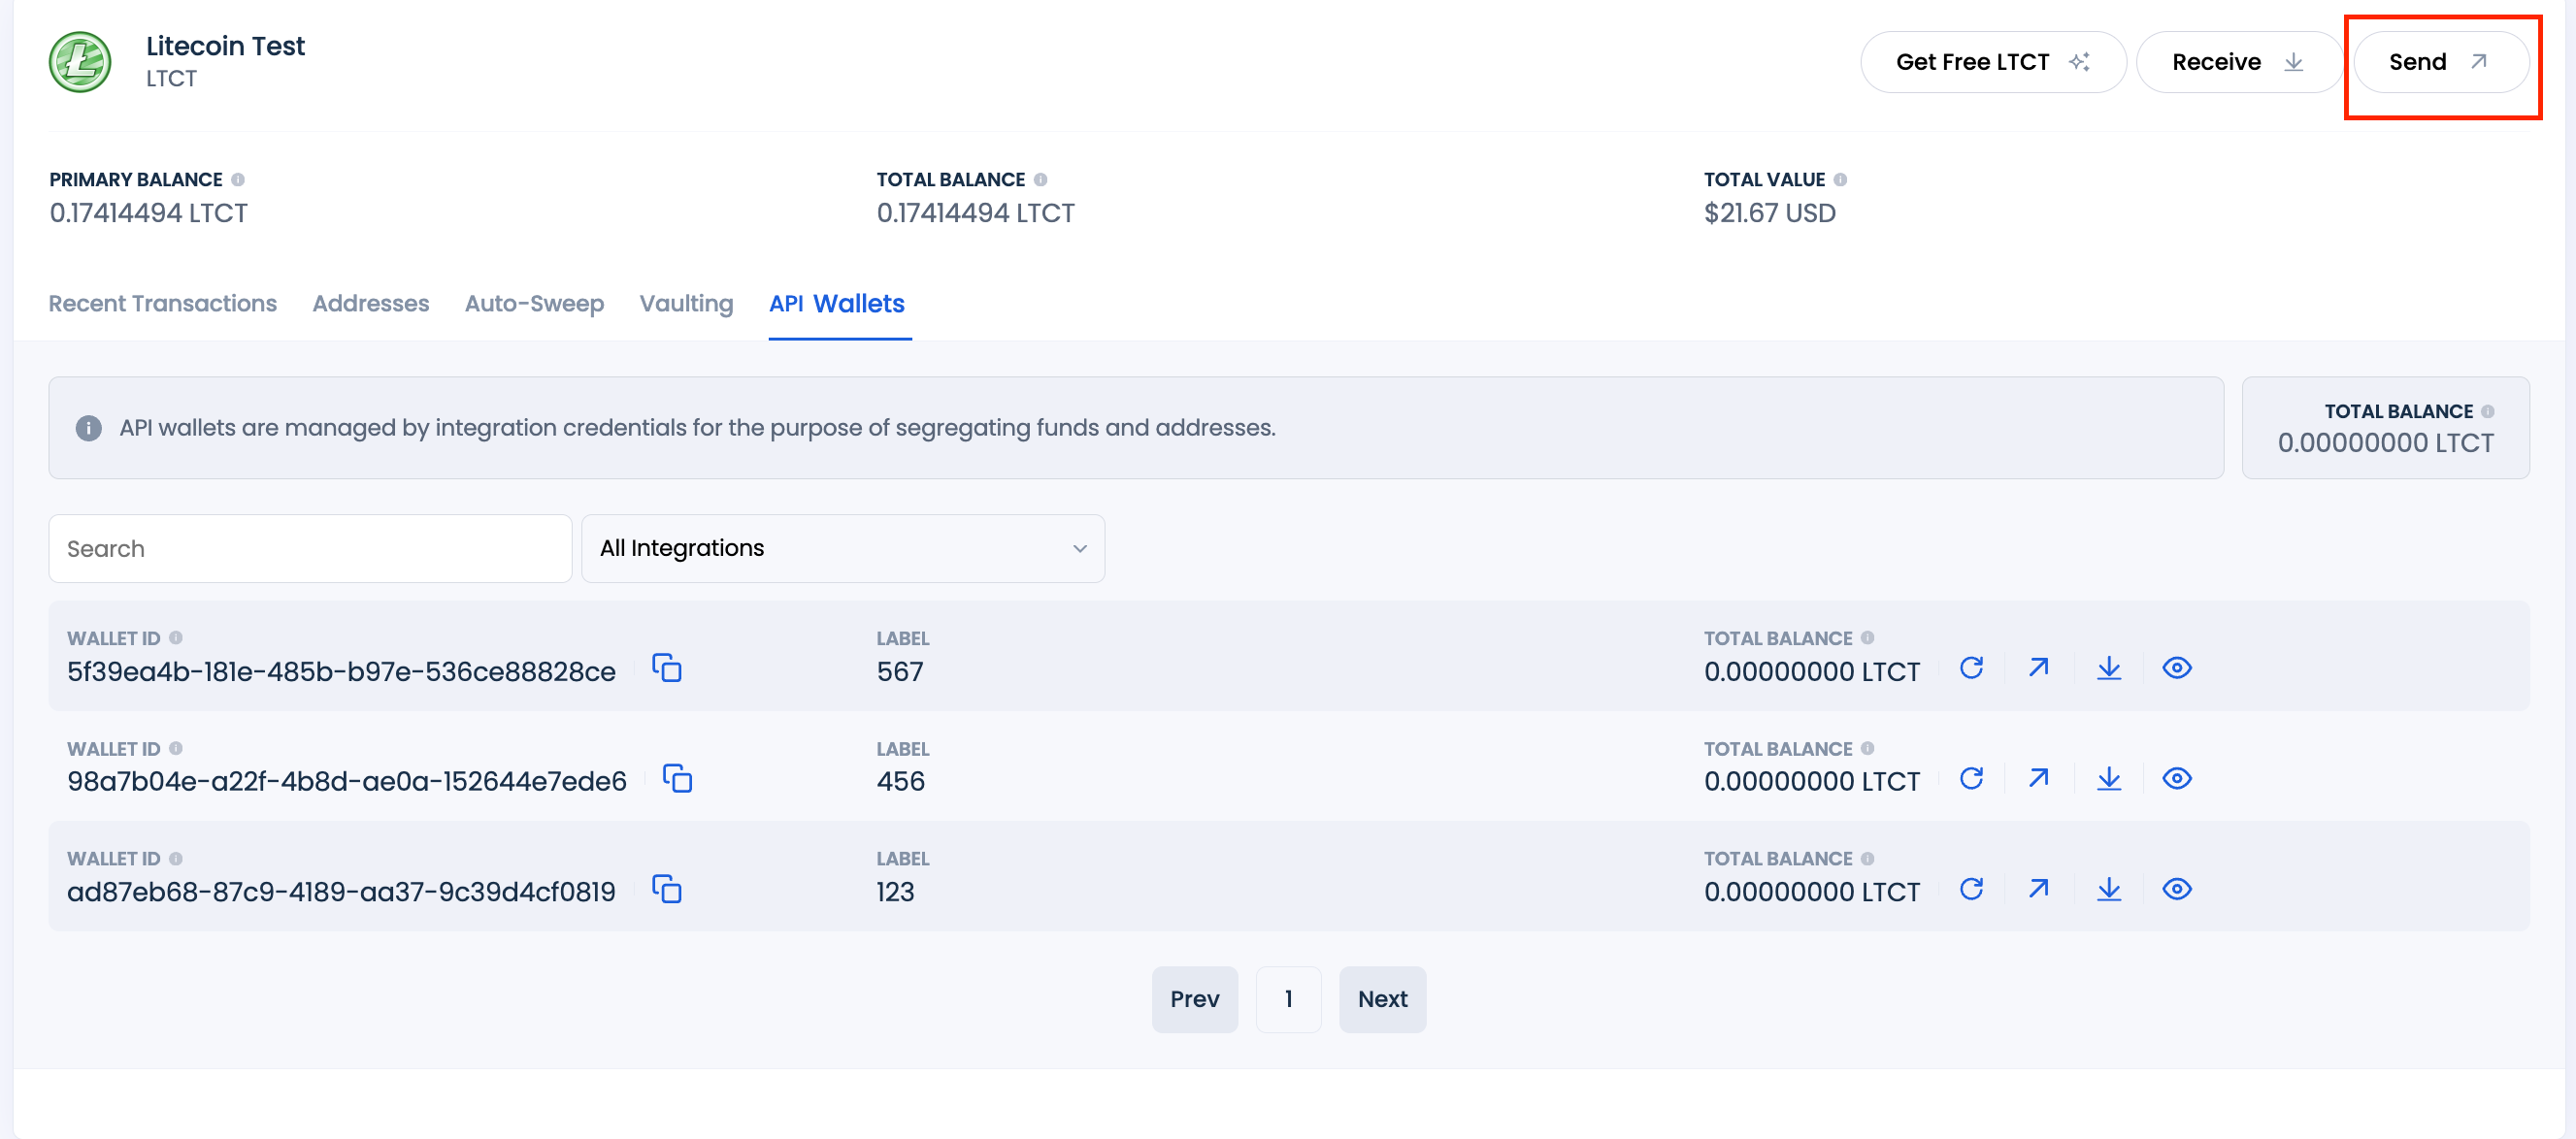
Initiate a Transfer:
Click the Send button next to the Primary wallet balance on the Dashboard UI.
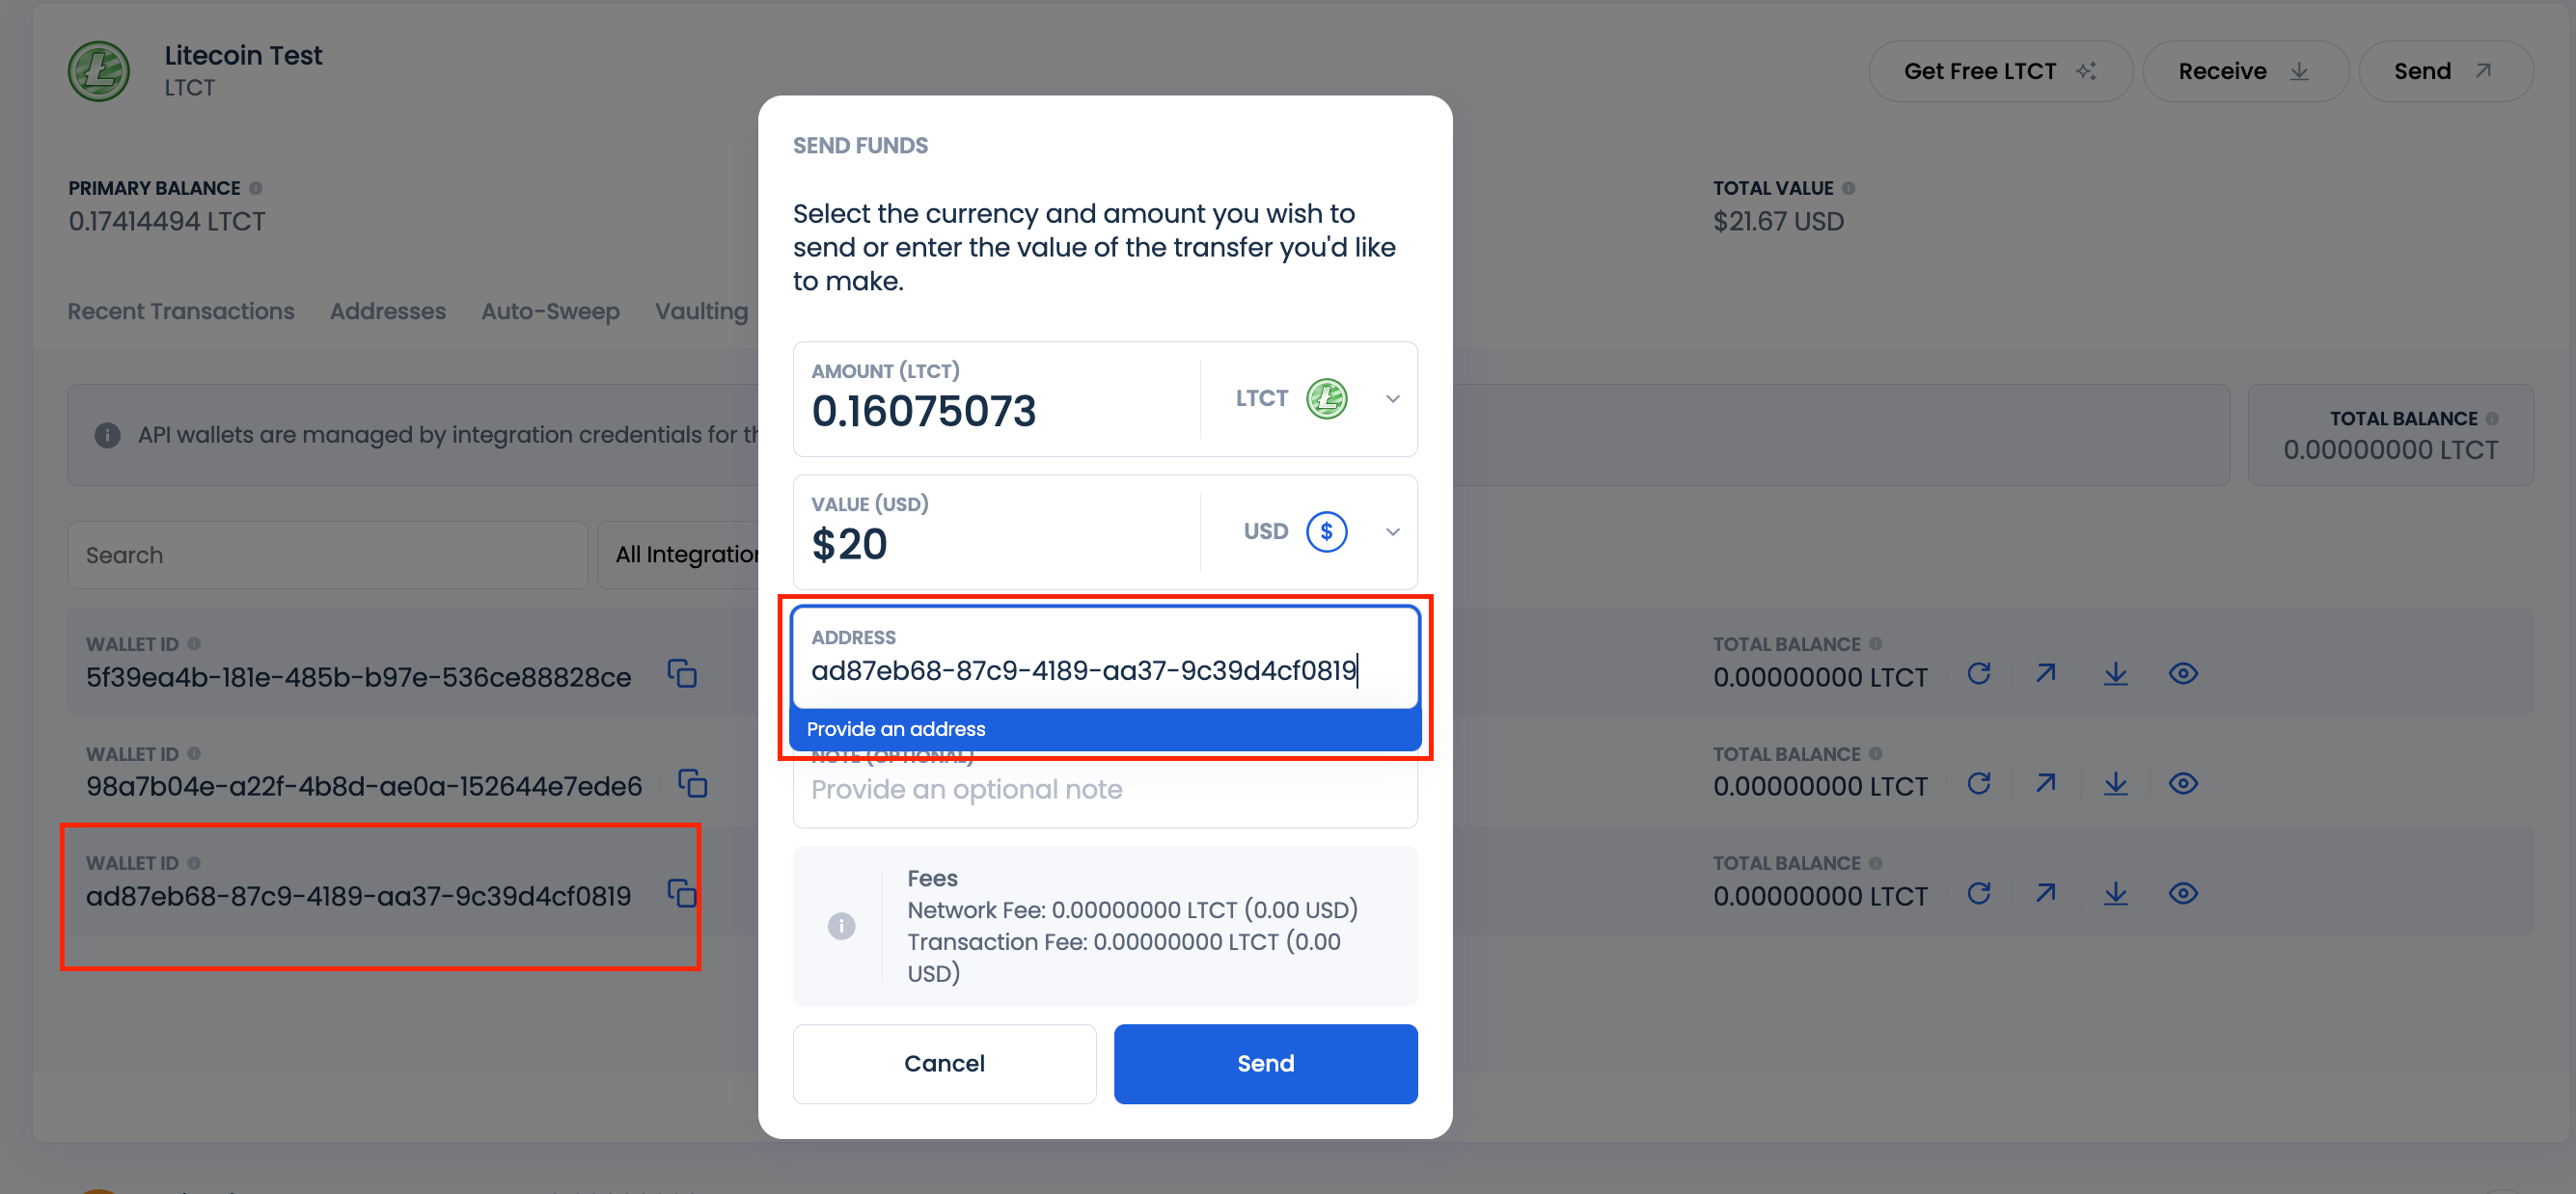
In the pop-up form, paste the copied API wallet ID and enter the amount to transfer.
Confirm the transfer.
Transferring Funds to API Wallets with Permanent Addresses
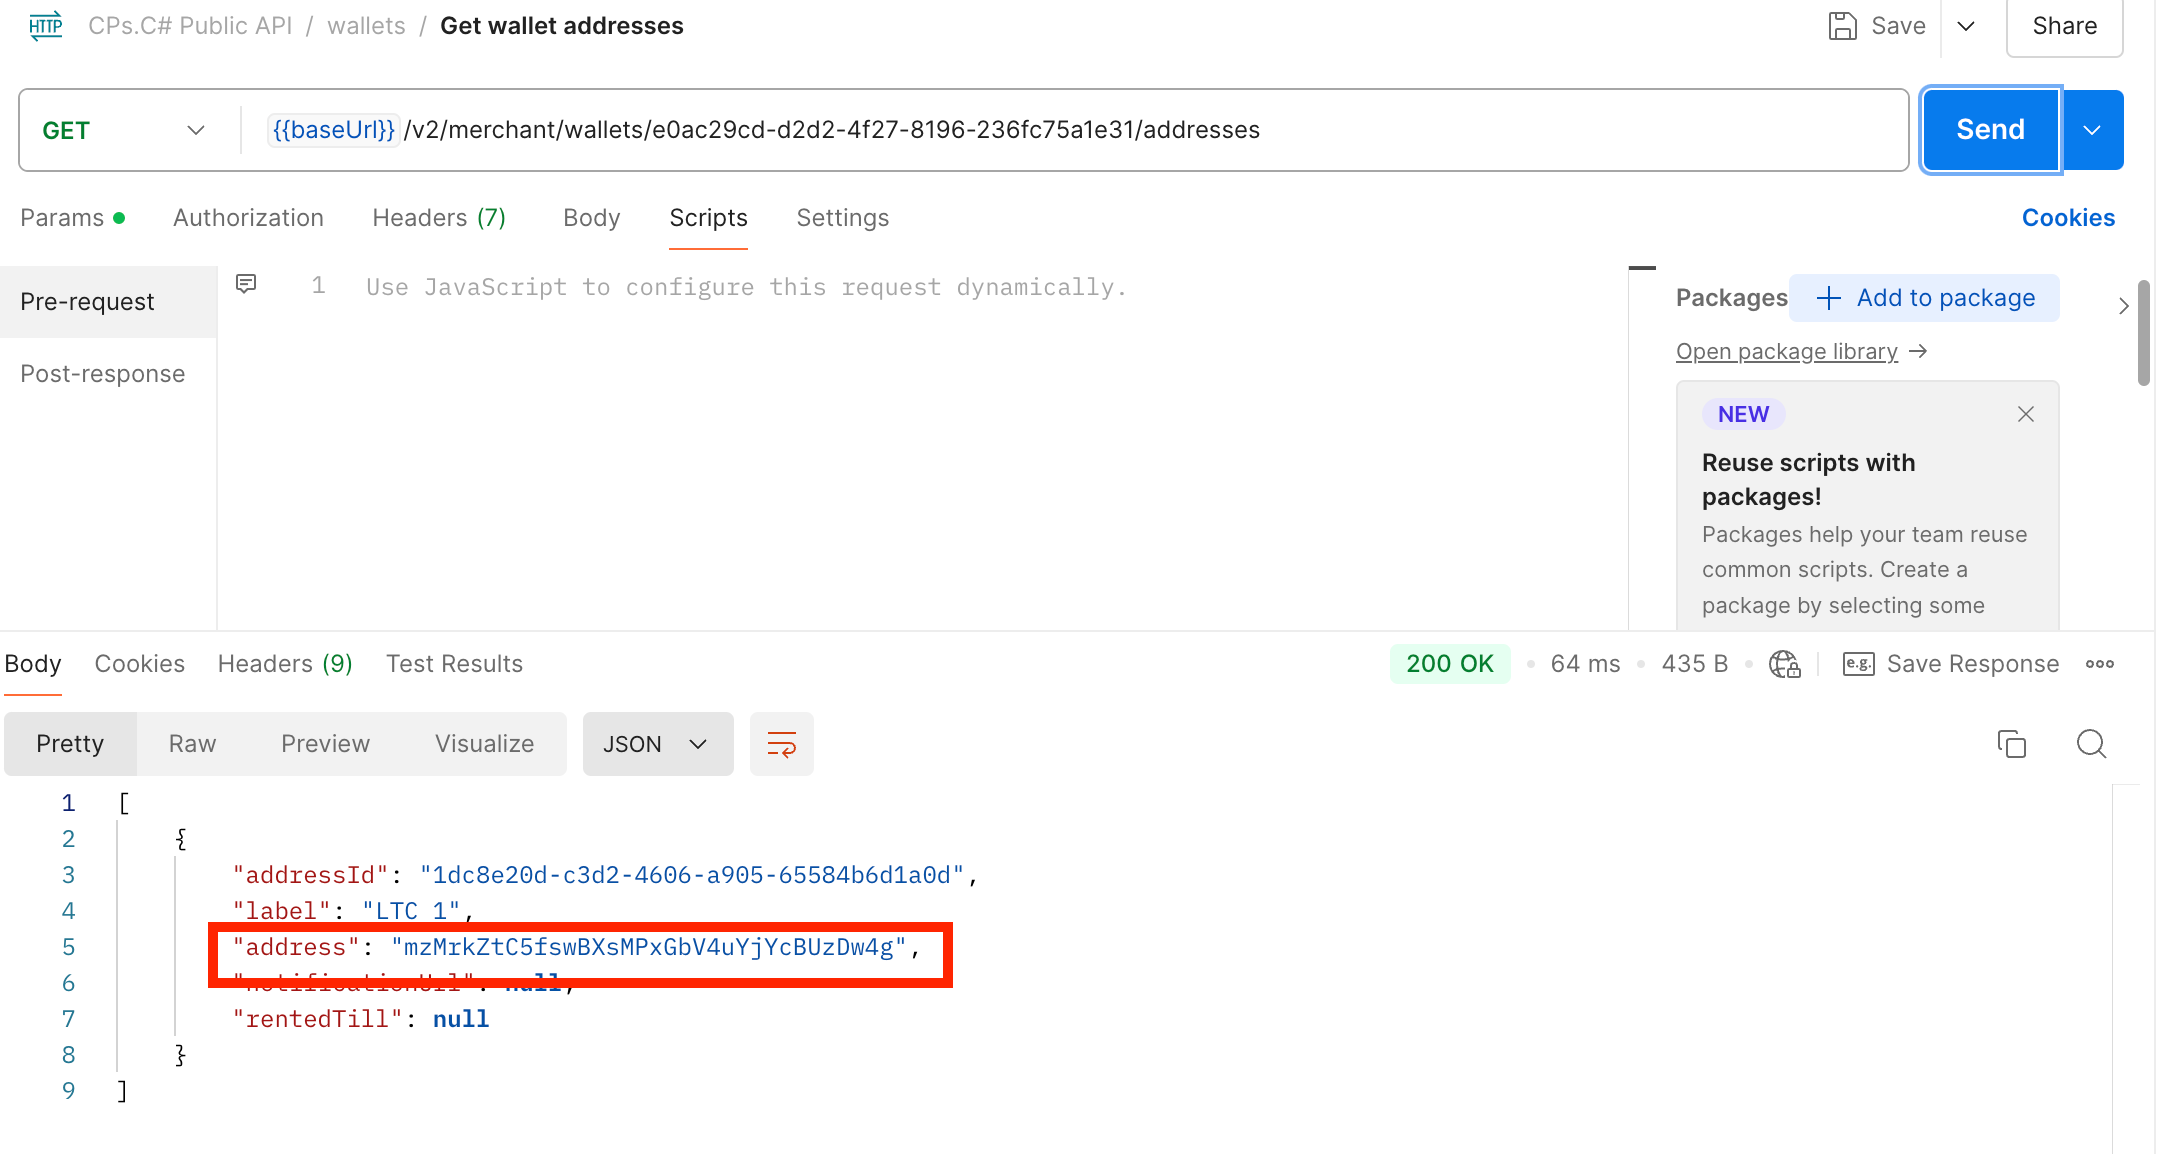
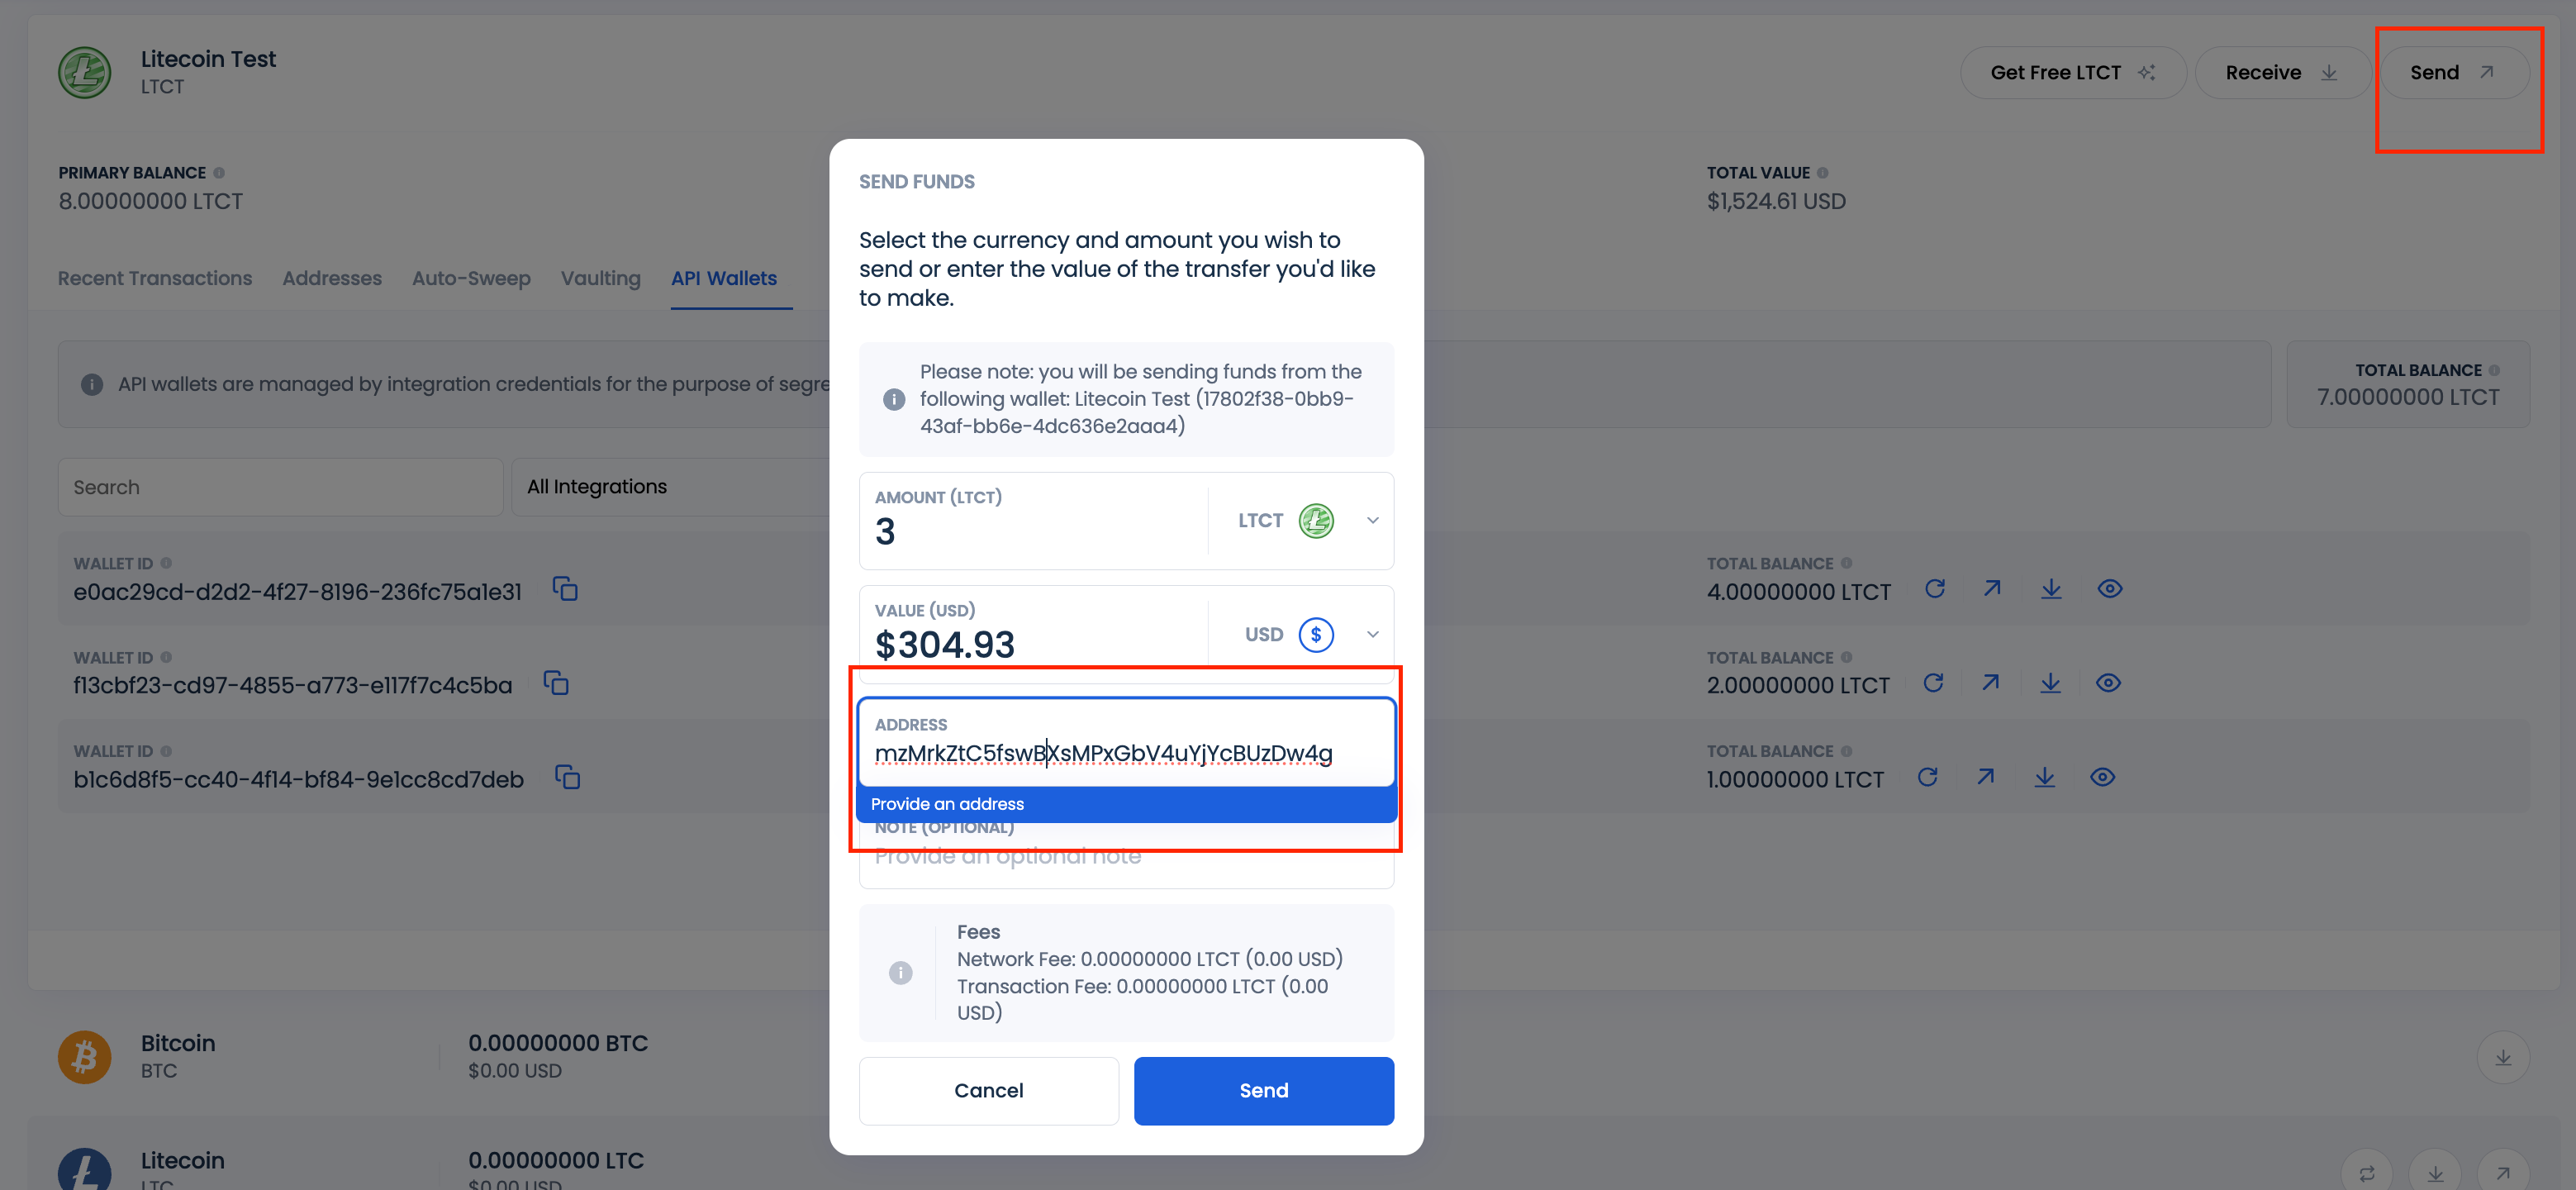
For API wallets using permanent addresses, funds must be deposited directly into an address within the wallet rather than into the wallet balance itself:
If you have any issue with the CoinPayments wallet, payment gateway or Point-of-Sale please follow this page which is the official site for any support issues. Submit your request here CoinPayments’ Support Wizard and our customer service reps will be happy to assist.